
Scenario
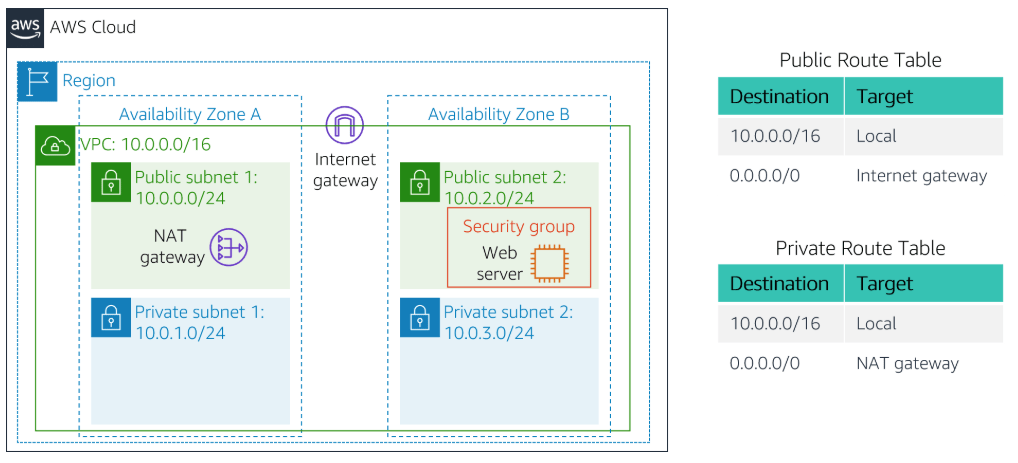
Below is the scenario we are aiming to make in this lab in AWS. In a VPC we will create a pair of public and private subnet in 2 different availability zone. The NAT gateway will be in public subnet 1 and a web server controlled by a security group will be deployed in public subnet 2. Looking at the route table, there are 2 tables which one of the is private route table that points to the NAT gateway and a public route table that points to the internet gateway.
Create VPC
In AWS dashboard, click on Services drop-down and find VPC under Networking & Content Delivery category. This is the display of a VPC dashboard. From here, click on Launch VPC Wizard to create a VPC through a wizard.

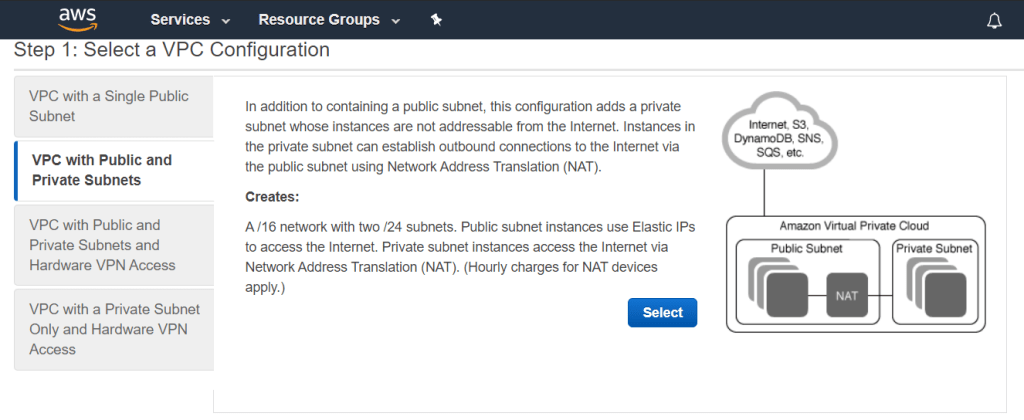
We will select a VPC with Public and Private Subnets for this scenario.
In configuring the subnets, there are several information that are already filled. Set the VPC subnet configuration like below. Make sure that the availability zone is us-east-1a (the first availability zone). Name each subnet accordingly and select an Elastic IP Allocation ID that is already provided by the lab.

At this point, the VPC is created.
Create Additional Subnets
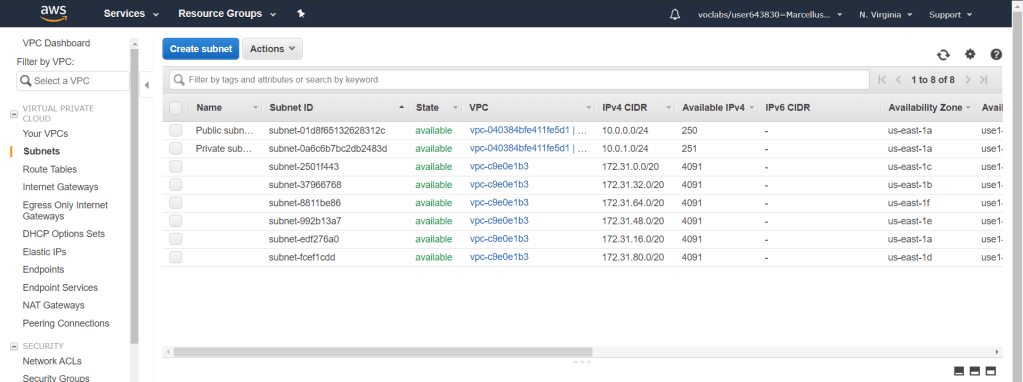
Now that the VPC, 1 public subnet and 1 private subnet has been created. We will have to create another one in the second availability zone. Go to Subnets menu on the left and you will see a list of subnets that are currently in AWS. As you can see the 2 subents we have created is already up. Click on Create subnet button above to create both of the required subnet to create the scenario.
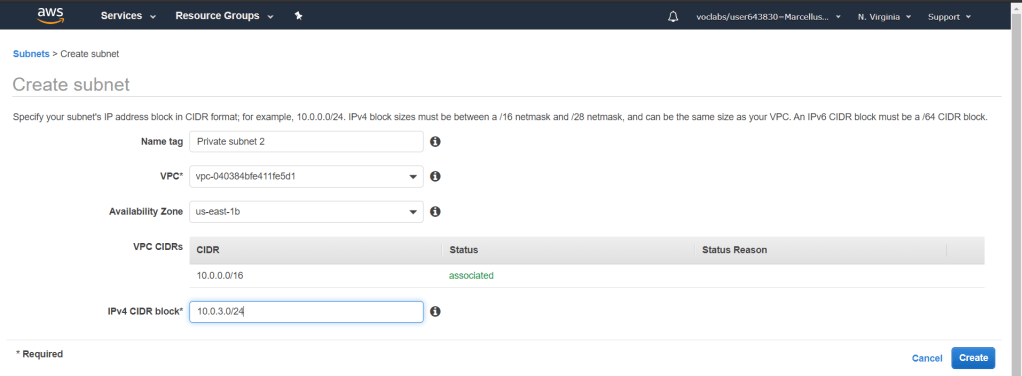
We will have to create 2 which is Public subnet 2 and Private subnet 2. Make sure that it is in the VPC that we had already set up. Choose the second availability zone which in my case is us-east-1b. Provide the IPv4 CIDR block accordingly.

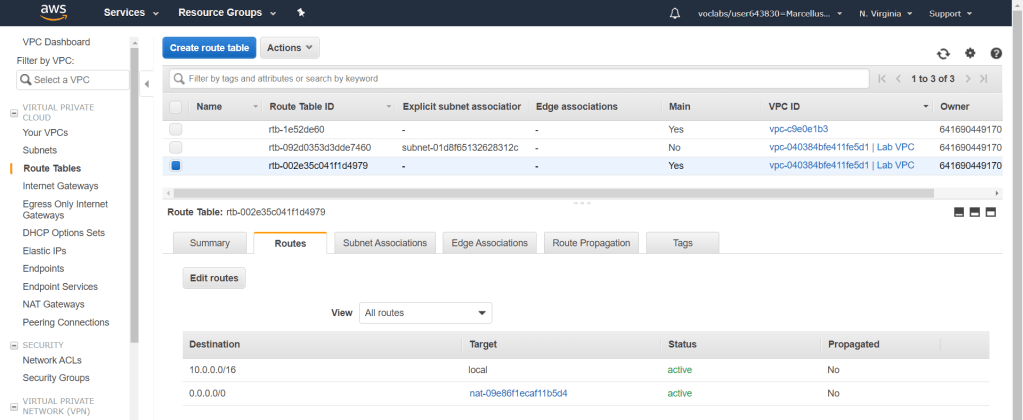
Next, we need to assign the subnets in the correct route table. We have to make sure that there is a private route table that associates with both private subnets and a public route table for the public subnets.
Go to Route Tables from the menu on the left and check on the one with Main = Yes and VPC ID = Lab VPC. If you look at its route, by default there are 2 routes and one of them is going to the NAT gateway. From that information, we know that this route table is the private one. Give it a name to provide better description of the route table.
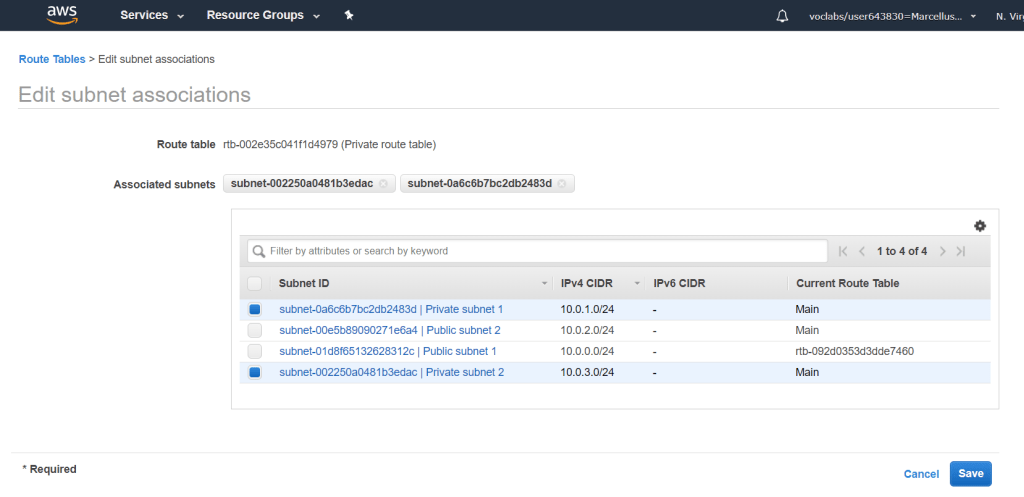
Next, click on Subnet Associations tab and click on Edit subnet associations. Check the private subnets and click Save.
Do the same for the Public route table and you will be able to see under the Subnet associations tab, subnets are assigned properly.

Create Security Groups
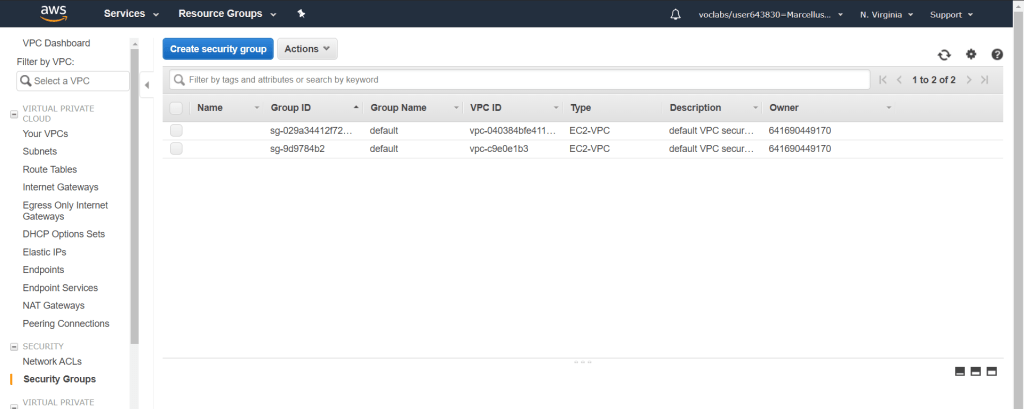
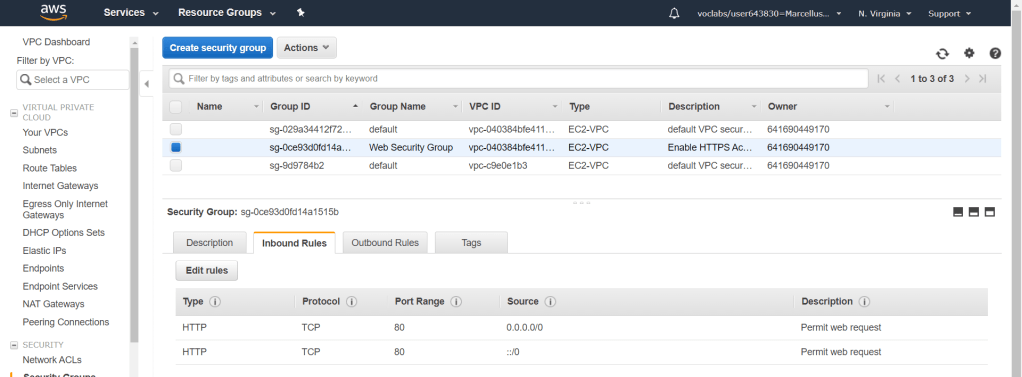
Next, we will create a security group to allow inbound traffic to the web server which we will create soon. Firstly, go to Security Groups menu from the left and click Create security group.
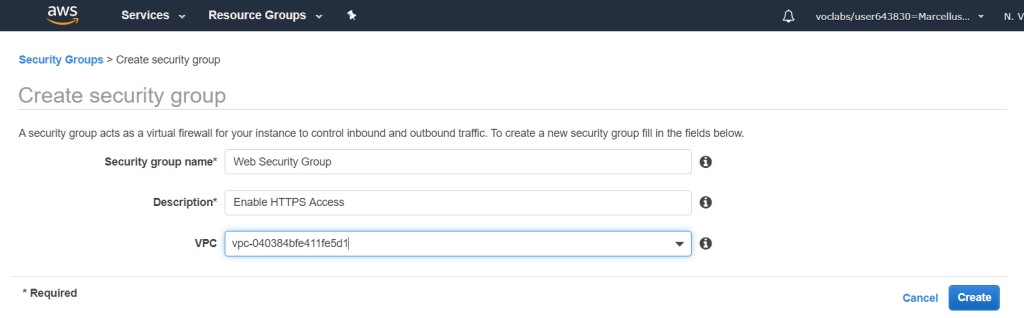
Fill in the information as below and makesure it is connected to the correct VPC.
Check the Web Security Group and go to the Inbound Rules then click on Edit rules. Choose the type as HTTP and source as Anywhere. Create the security group and it will be displayed under the Inbound Rules. This rule will allow any inbound traffic to any instance in this security group.
Launch a Web Server Instance
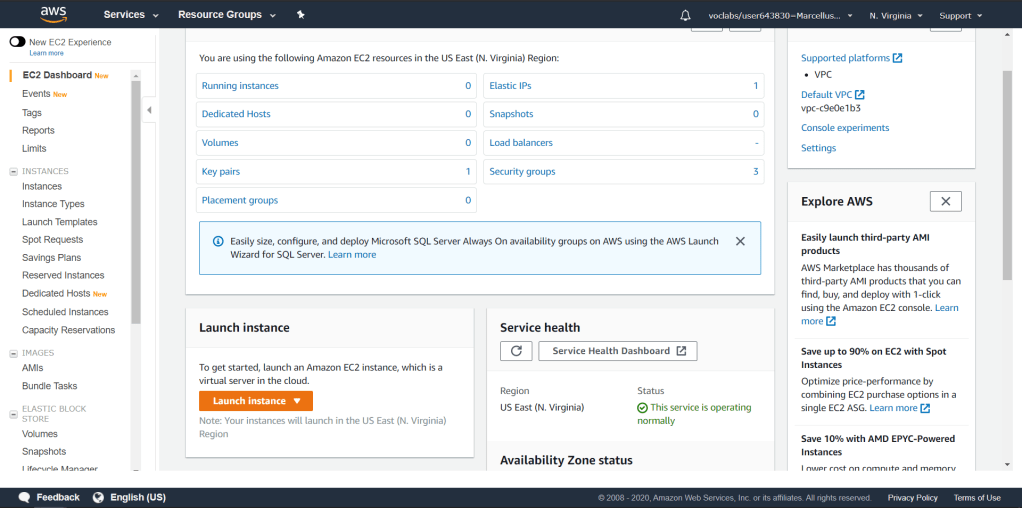
Now go to EC2 dashboard under the Compute category. We will create a web server instance through EC2. Click on Launch Instance to launch one.
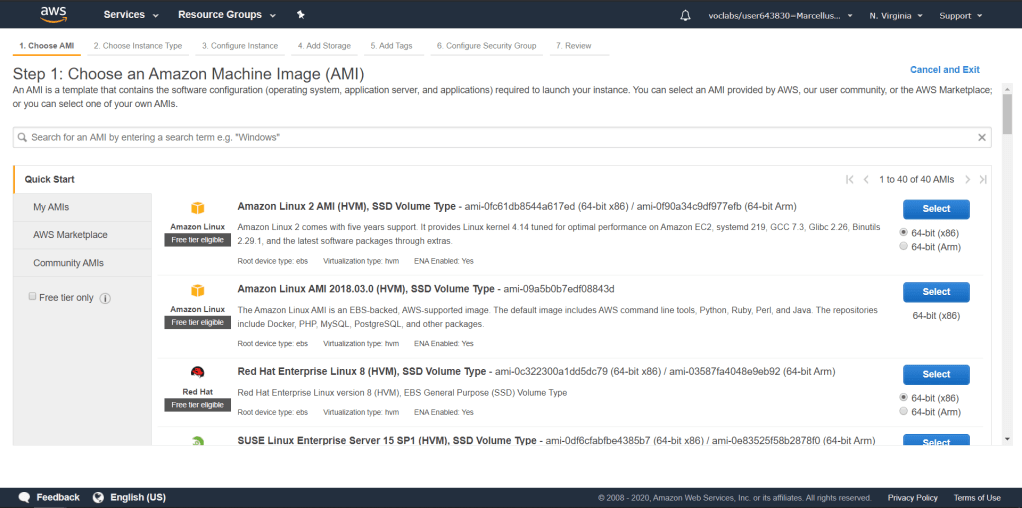
Next step is to choose an AMI in which we will choose the one provided from AWS, Amazon Linux 2 AMI. Click Select.
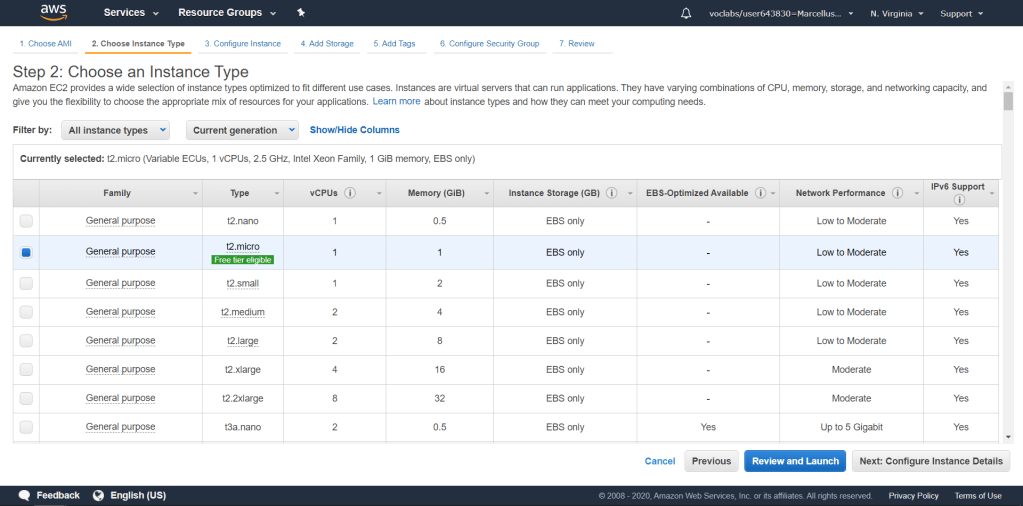
Choose the t2.micro instance type and click on Next: Configure Instance Details.
Configure the instance details as shown below. Make sure it is in the right VPC and under Public subnet 2 as the scenario stated. Enable Auto-assign Public IP.

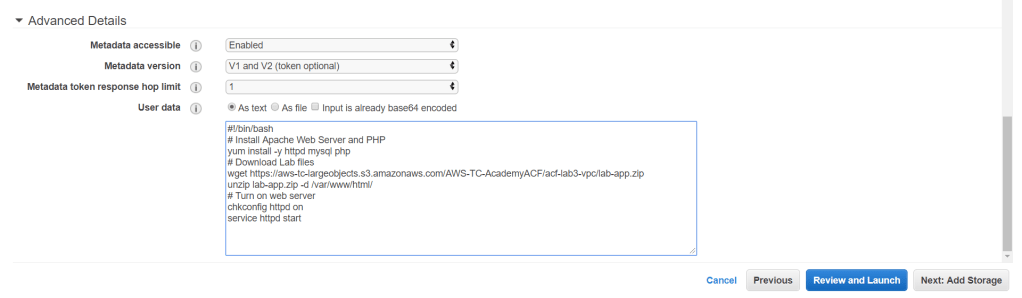
Go under Advanced Details and in User data, input this command.
#!/bin/bash
# Install Apache Web Server and PHP
yum install -y httpd mysql php
# Download Lab files
wget https://aws-tc-largeobjects.s3.amazonaws.com/AWS-TC-AcademyACF/acf-lab3-vpc/lab-app.zip
unzip lab-app.zip -d /var/www/html/
# Turn on web server
chkconfig httpd on
service httpd start
This code will run when the instance launches and it will load and configure a PHP web application. Click Next: Add Storage.
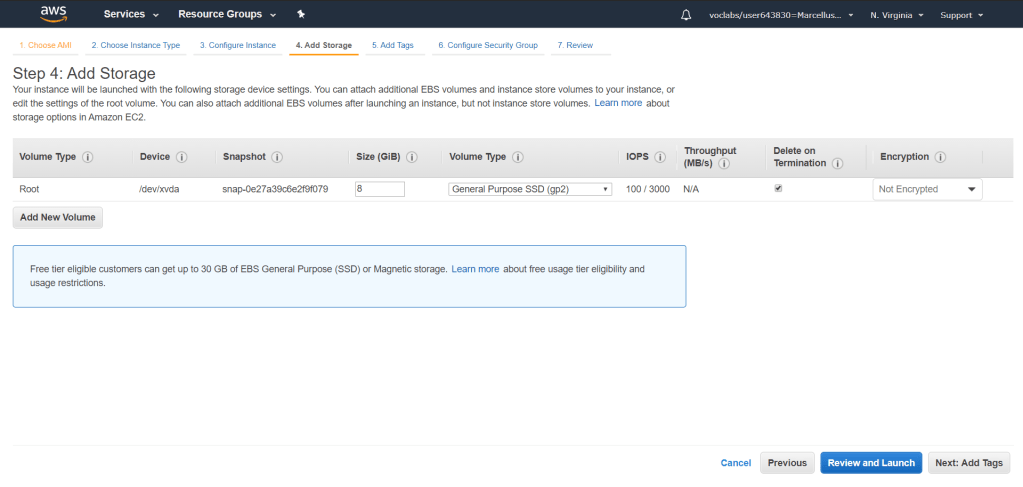
We will use the default storage available. Click Next: Add Tags.
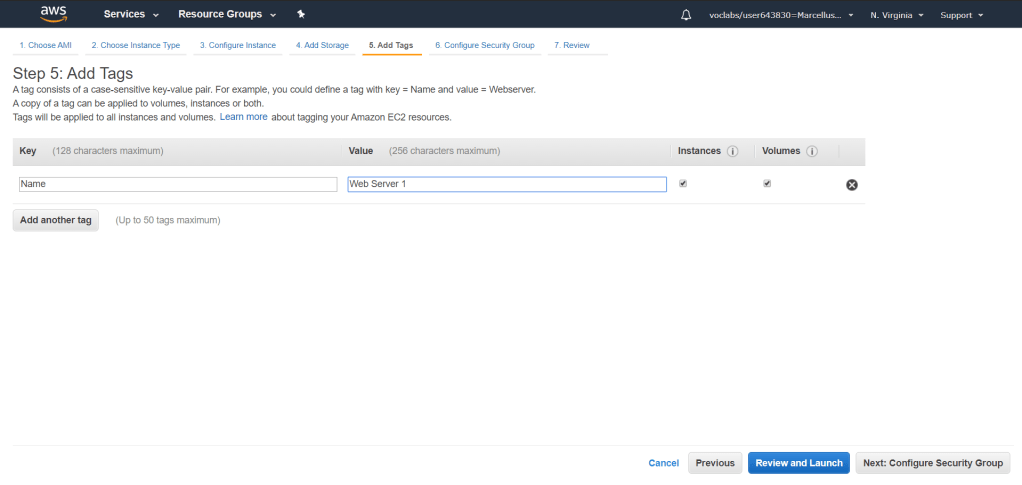
Add a tag and put Name on Key and Web Server 1 on Value. Click Next: Configure Security Group.
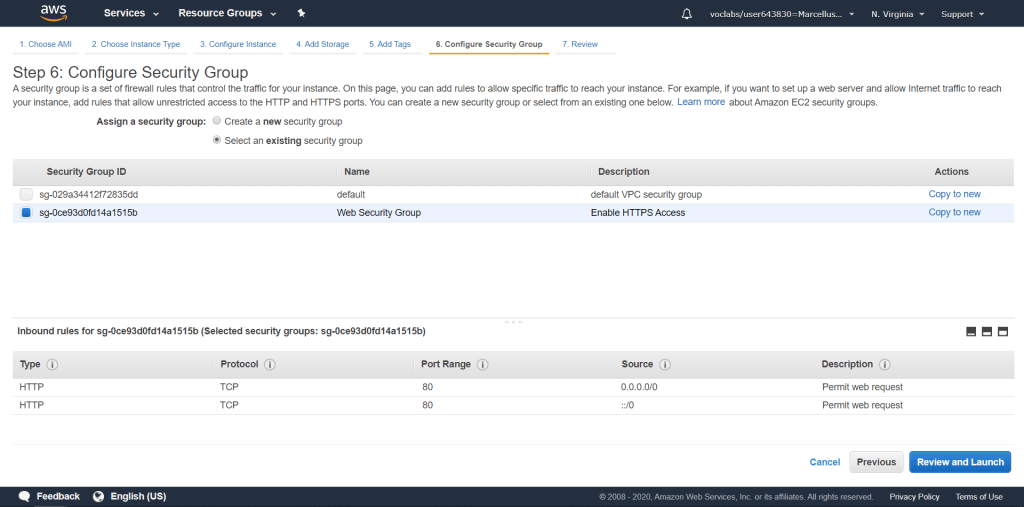
We will choose the security group we have created previously with the name of Web Security Group. This means that the rules will be applied to this instance which is allow any inbound traffic. Click Review and Launch.
In this page you can review the instance configurations and make sure it is correctly set up as it cannot be changed after it has launched.
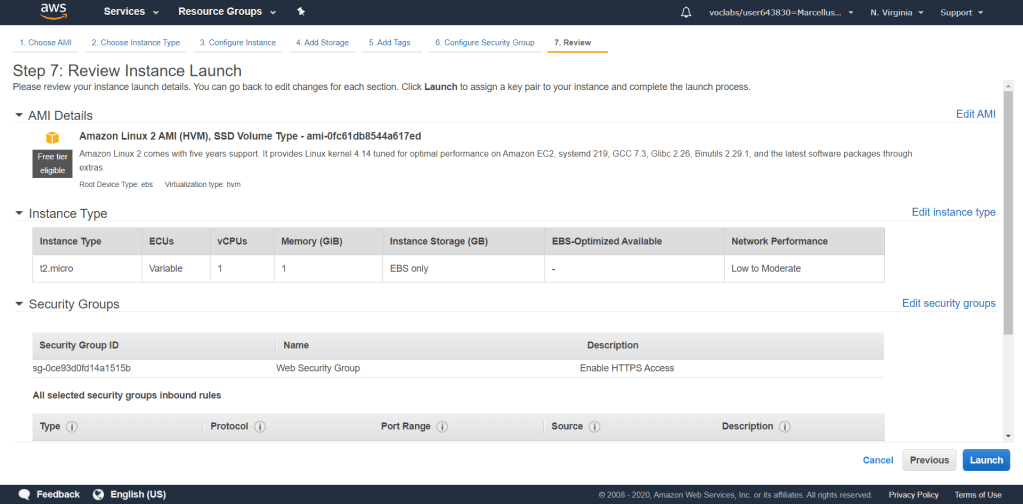
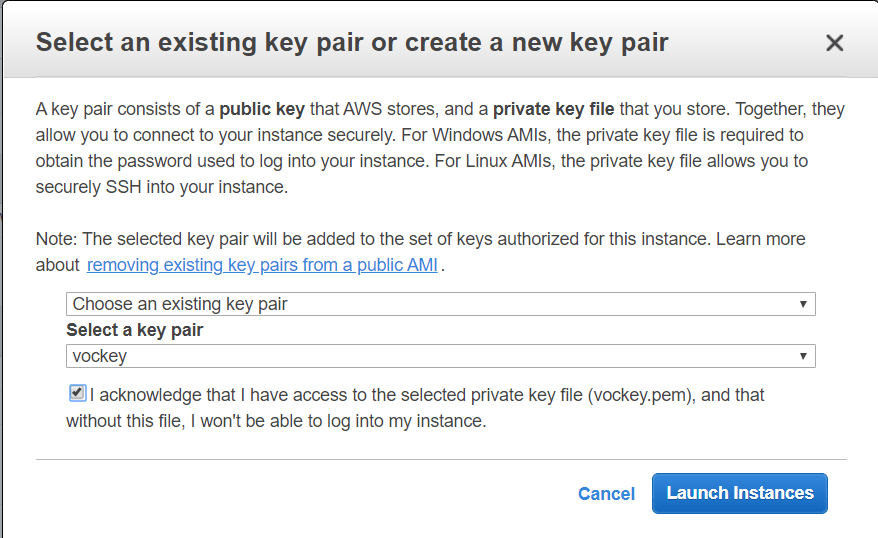
For security, AWS will ask a key pair set for every instance launched. This key will be required on connecting to the instance to create a secure connection. In this lab, I chose an exisiting key pair which has been previously provided. Click Launch Instances.
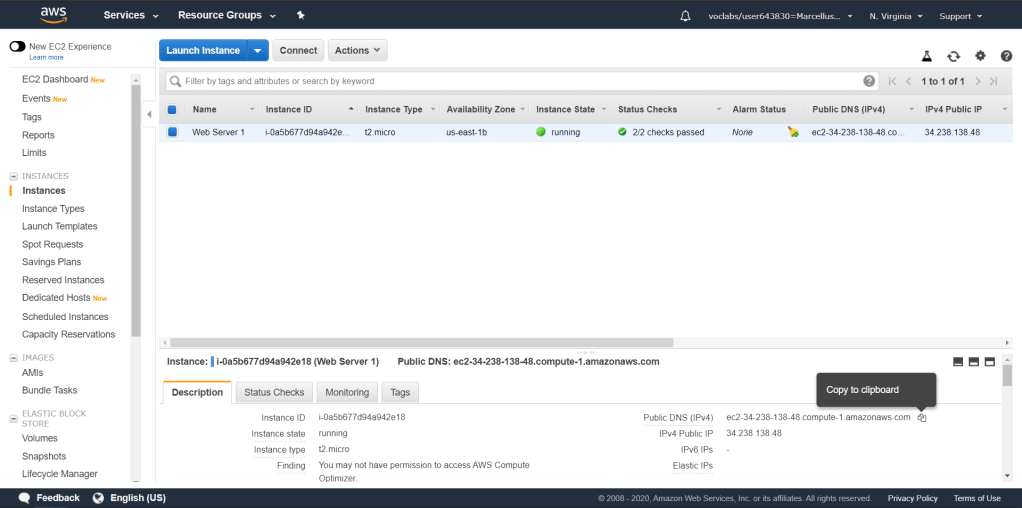
It will take a while to wait until the instance is properly launched. Wait until Status Checks displays 2/2 checks passed. Next, we will try to connect to the instance through the Public DNS. You can find the Public DNS under description and copy the URL to a browser.
The information below shows that we could properly connect to a web server that we just set up.

Critical Thinking
There are a few key points here to take from the lab. First of all, subnets can be located in different availability zones in a region. The idea is to add the capability to separate functions or balance network traffics. However, a subnet could only be inside one availability zone. The VPC itself has the capability to cover different regions and availability zones.
Subnets could easily be configured and separated as public and private. AWS also provide a nice and easy wizard to set it all up and get it configured. The route tables are automatically created as well and you could easily associate the appropriate subents to its route table. With this route table, the private subnets are separated in its own network and capable to connect to the internet through the NAT gateway which is located in the public subnet. The route table in the public subnet could then route to the internet gateway.
There are ways to securely protect your network as well as your applications in the cloud. In this lab, we implement security groups which we attach the web server in. The security groups are capable to control both inbound and outbound traffic with an allow only rules. Another way to implement security on a network is through an access control list (ACL). This is located on a subnet level which is different compared to security groups which is on a instance level. ACL provides a control on both inbound and outbound traffic with allow and deny rules.
A VPN could also be implemented in a VPC by creating a VPN gateway and the customer gateway (which is an AWS resource). Allow the connection through security groups and set the VPN gateway route in the route table. This will ensure the connection can be established securely.
