
In this post, we will cover the basic introduction of an ESXi machines and the network configuration of it. It is a really simple configuration and we will go through step by step here.
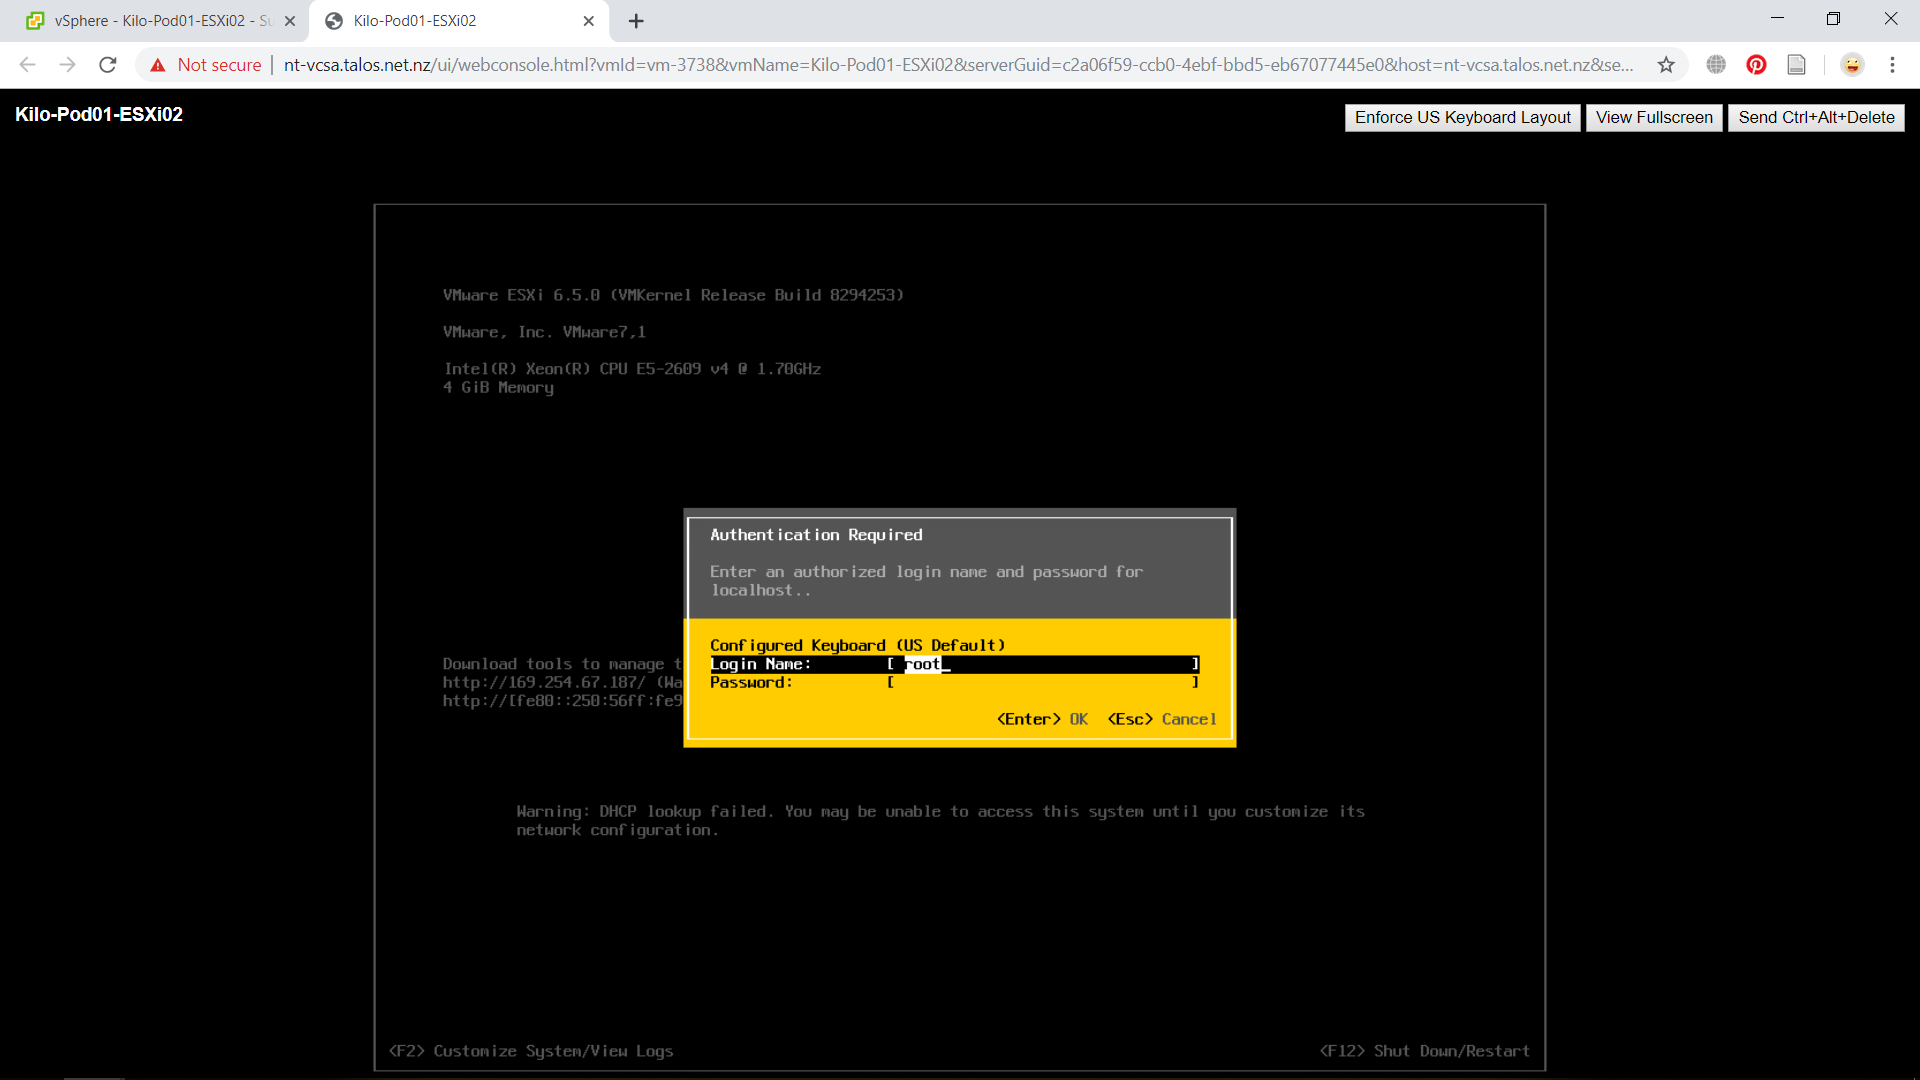
As we power on the machine, we will be greeted with a gray and yellow display. Press F2 to enter your credentials that you have previously set. The login name is by default root, you would only need to input the password. Press Enter to continue.
You should be redirected to the System Customization as displayed in Figure 2. If you would like to change your password. You could go to the Configure Password menu. You would only need to enter your old password and new password to change it.

We will now try to configure the network setting of ESXi. Use arrows to navigate the menu and press Enter on Configure Management Network. As you can see in Figure 3, we could configure various network management including IP addresses and DNS which what we will configure next.

Choose the IPv4 Configuration and a window will appear. As for this host, we will set it with a static IP thus choose the Set static IPv4 address and network configuration by pressing space on it. It will also enable you to change the addresses below it. Fill in the IPv4 address, subnet mask and default gateway as preferred then press Enter to confirm the settings.

Next we will go also change the DNS configuration by choosing the menu in the Configure Management Network page. Input your prefered DNS address in the Primary DNS Server and you could also change your hostname for your ESXi machine. Press Enter to confirm the settings.

Press Esc key to exit and press Y to accept all changes in the Configure Management Network settings. We will be redirected back to the System Customization page.
In the ESXi host, we are able to check various system logs. We will view the general system log for example. In System Customization page, highlight the View System Logs and on the right side we will see all sorts of logs that we could check.

Press 1 to access the system logs. Use arrow key and space to navigate the logs. We could all the recent changes we have done from the logs displayed. Press Q to go back to System Customization page.

SSH could also be enabled in ESXi host for a secure communication with client. In the System Customization page, choose Troubleshooting Options then press Enter while highlighted in Enable SSH. The current status of the SSH is displayed on the right pane. Press Esc key to go back to the previous page.

To exit the ESXi host, press Esc from the System Customization page to log out. Afterwards, press F12 to shut down or restart the machine. Before shutting down, you would be asked for credentials again for security measure. Press F2 to shut down or F11 to restart the machine. The process will start instantly.
