
Log in to your vSphere Client before starting this Lab. Information about log in interface can be reviewed here.
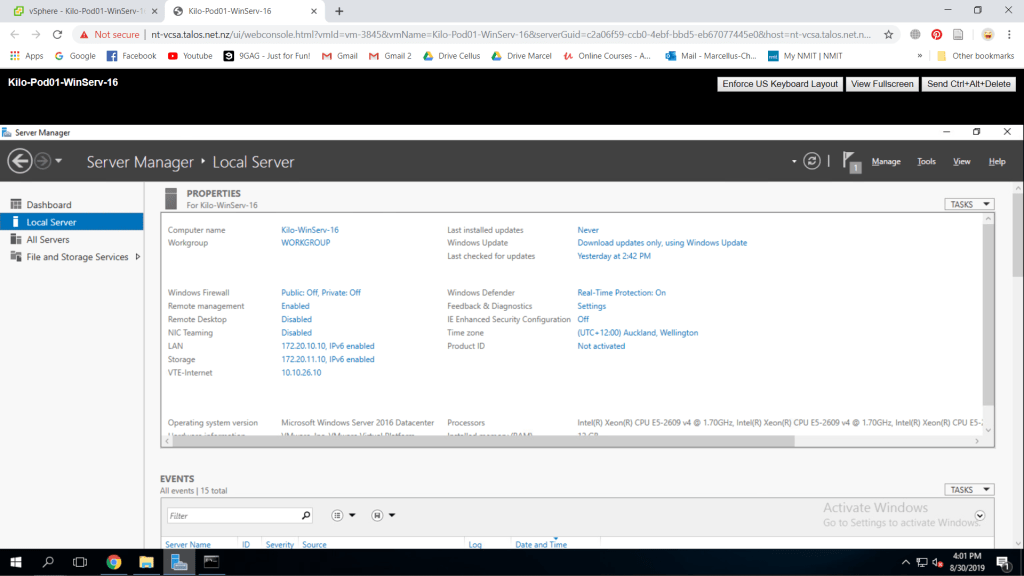
It is required to have ESXi and a Windows Server installed and configured previously for the VMWare vCenter Server Appliance (VCSA) to work. What I have done before this lab is creating two ESXi hosts and one Windows Server 2016 which has been configured for connection.
Deploy VMWare vCenter Server Appliance
As of right now, I am creating a ESXi environtment inside a virtual machine. Thus, we will establish access to ESXi host through the Windows Server VM. But firstly, we should mount the VCSA installer on the Windows Server VM or your preferred VM to start the installation from it.
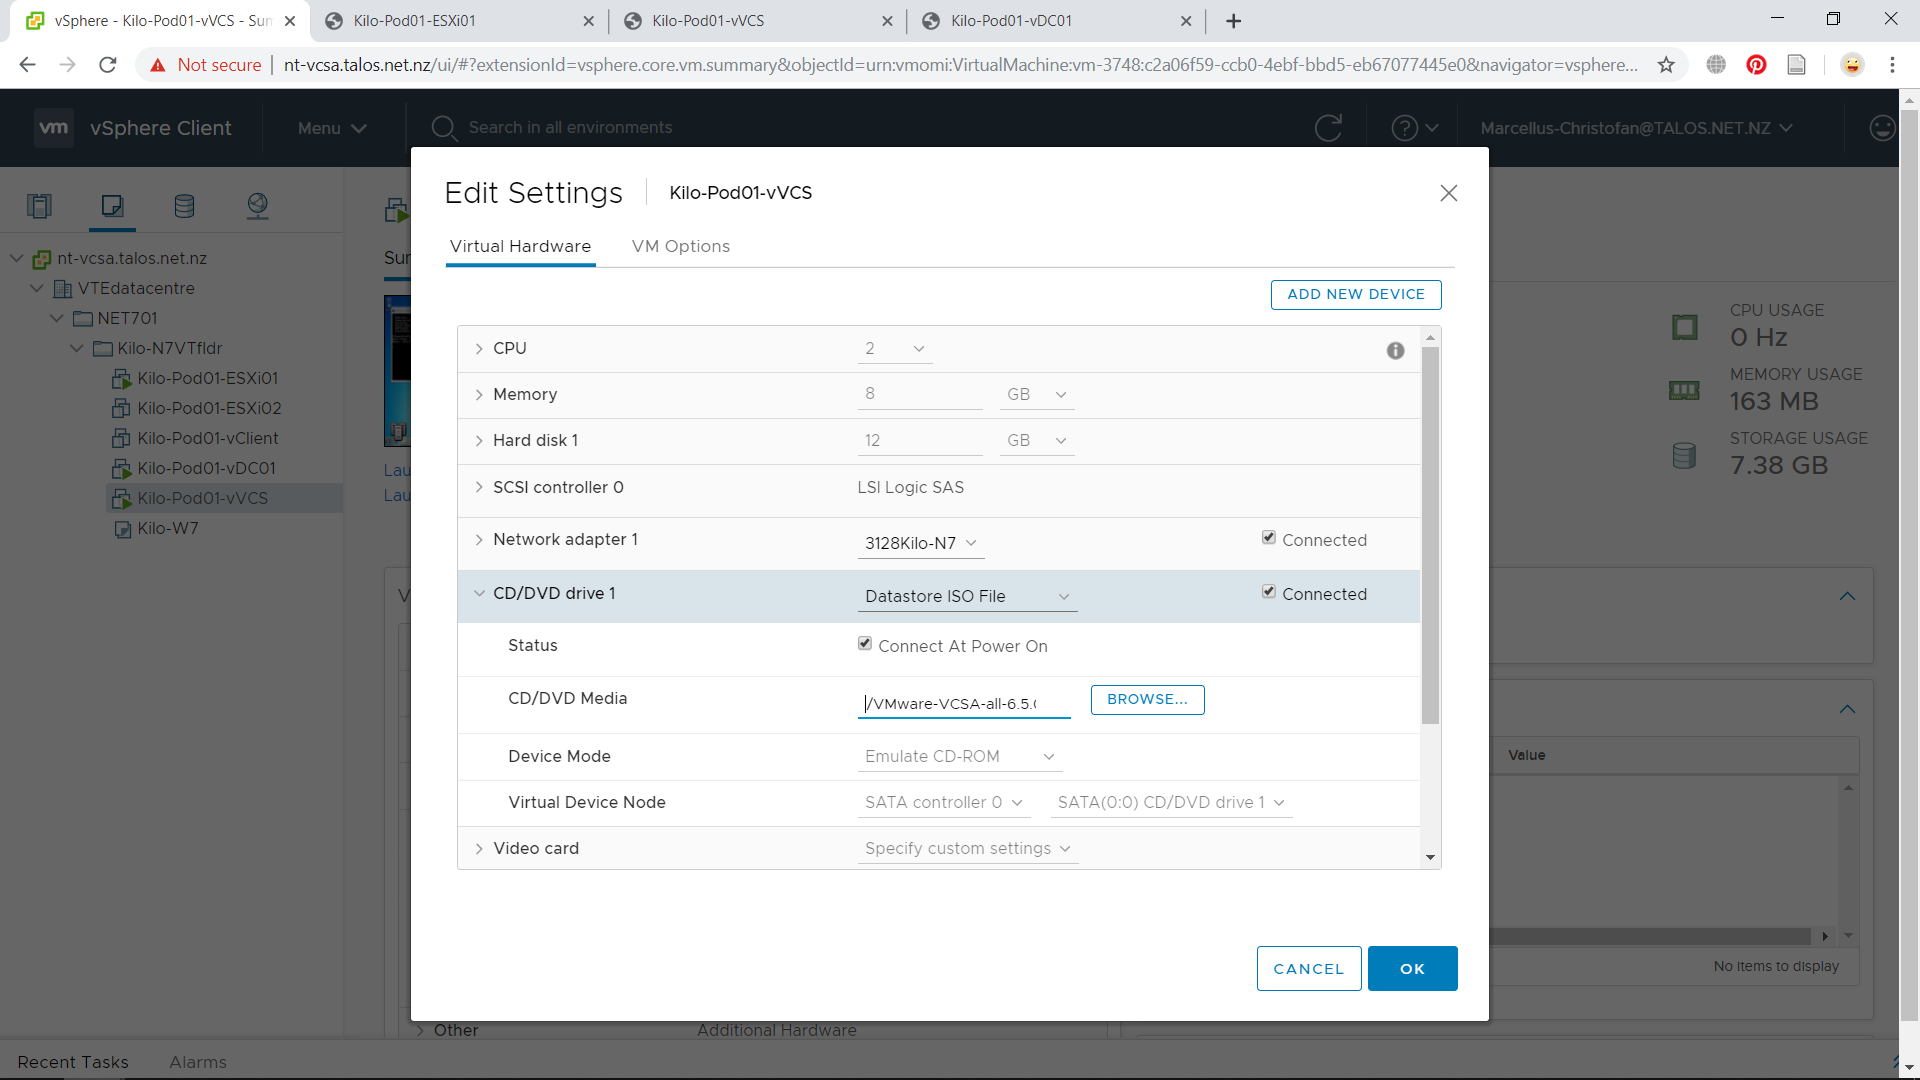
Go to the particular VM where you want to install the VCSA in. Right click the VM and go to Edit Settings. We will mount the VCSA ISO in to the machine. Access the CD/DVD Drive and change the CD/DVD Media to the VCSA installer ISO as seen in Figure 1. Do not forget to check the Connected checkbox. Press OK if you are done.
Before starting the installation, we will try to make sure if the VM could detect the ESXi host or not. The simplest way to do it is to ping the IP address of the ESXi host. It should be able to response correctly like shown in Figure 2. If it doesn’t respond correctly, try to configure your IP address and gateway on the ESXi host and on this VM.

I also disabled some configurations on the Windows Server machine which would just make things easier. Like shown in Figure 3, turning off the windows firewall and IE enhanced security would make the installation process much more simple.
After that, we will try to log in to the ESXi host through the internet browser which you preferred and type in http://<ESXi IP Address>/ on the URL bar. By then, you would be directed to the ESXi host log in page which means you have configured your connections properly. Enter your credentials, which is the same as the one registered for the ESXi host, just to make sure you that you can access it.

We are now ready to start the VCSA installation on the Windows Server VM or your preferred VM. VCSA will deployed inside the ESXi host, not in the VM executing the installer. Access Windows Explorer and access the mounted disc which is the VCSA installer. Go to vcsa-ui-installer > win32 > installer.exe and run the installer.

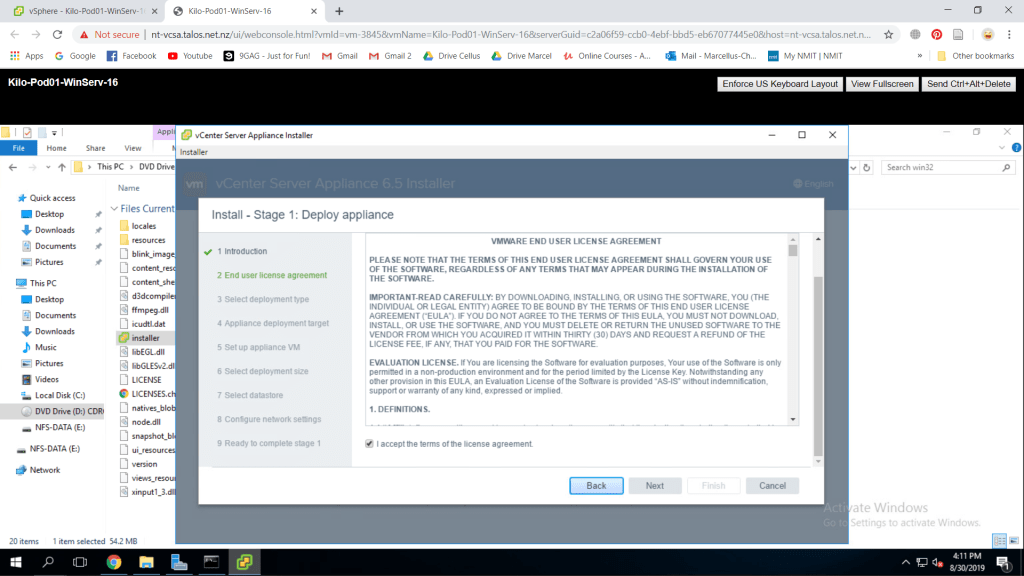
The installation window will appear and press Next to continue with the installation. Next page is the EULA, scroll down to find the agreement checkbox and check it to continue to the next step.
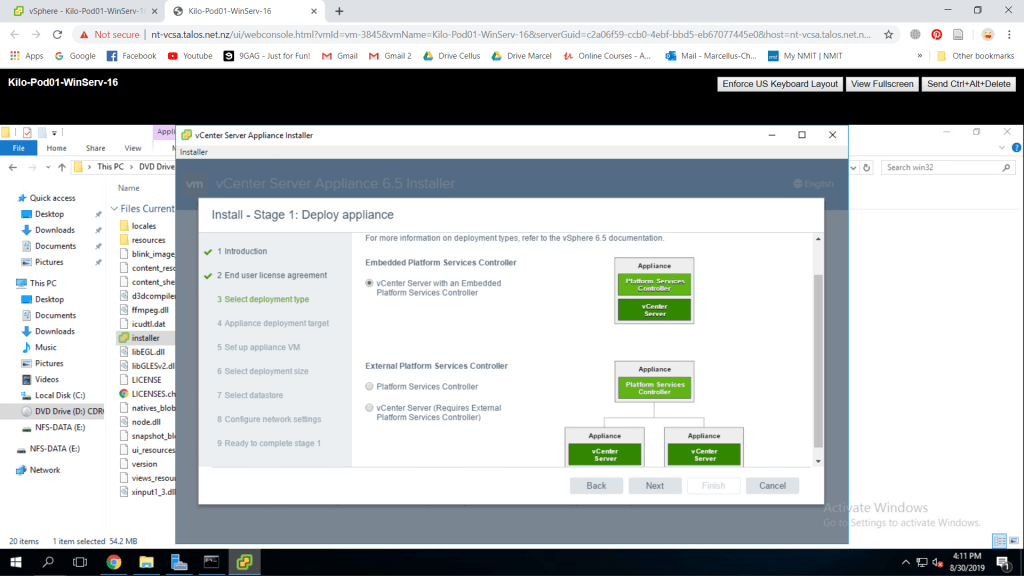
Next part is where you have to choose a deployment type. As this will be a small scale lab, it would be better to choose the Embedded Platform Services Controller. Press Next to continue.
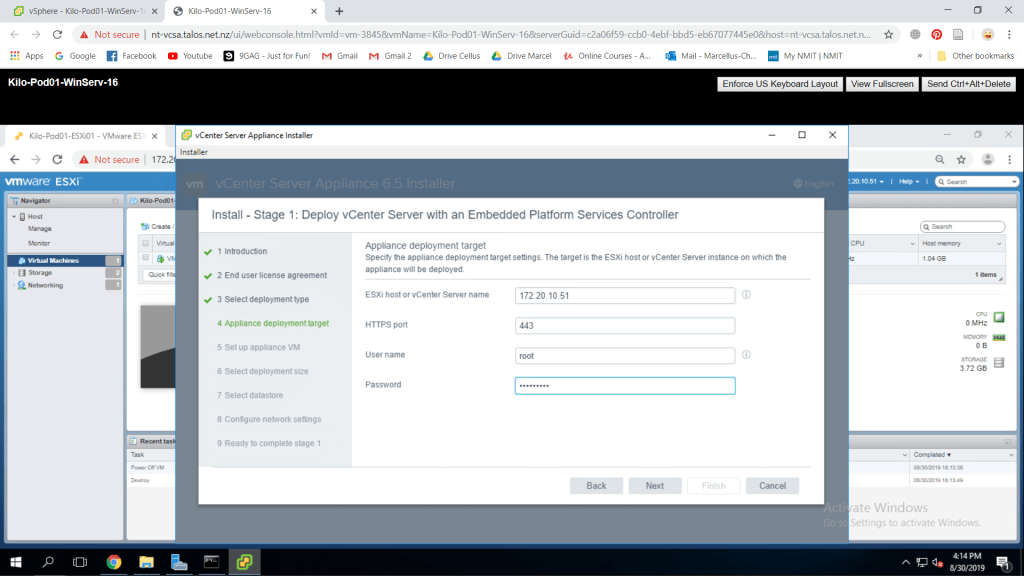
We will now input the target ESXi host for the vCenter. You can fill in the ESXi host name with its FQDN or IP Address. As my network don’t have DNS installed, I inputed the ESXi host IP Address instead. Leave the HTTPS port as default which is 443. For username and password, it refers to the ESXi administrative credentials. Press Next if you have filled all the textbox. There will be a certificate warning popping up, press Yes to continue.
After that, we will need to provide the appliance VM name and its password. Fill in all information as preferred then press Next to continue.

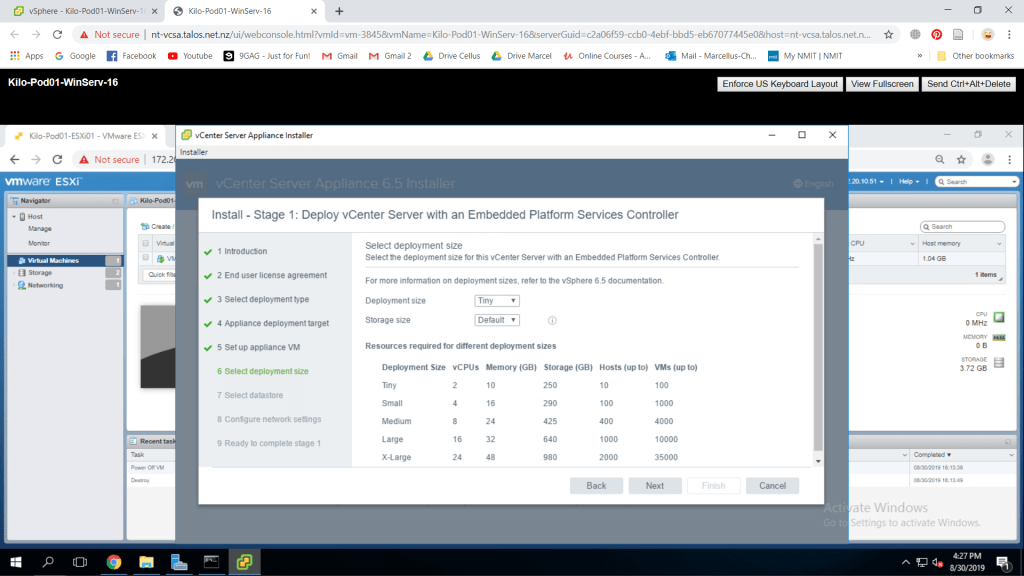
Leave the deployment size as it is which is Tiny. You could also see the information below it about how much requirements does it take for every deployment size available. Make sure that your ESXi host machine meets its required resources. For my case, the memory I provided was too small, which is a 4 GB memory. I changed the ESXi host memory to 16 GB and successfully proceed with the Tiny deployment size.
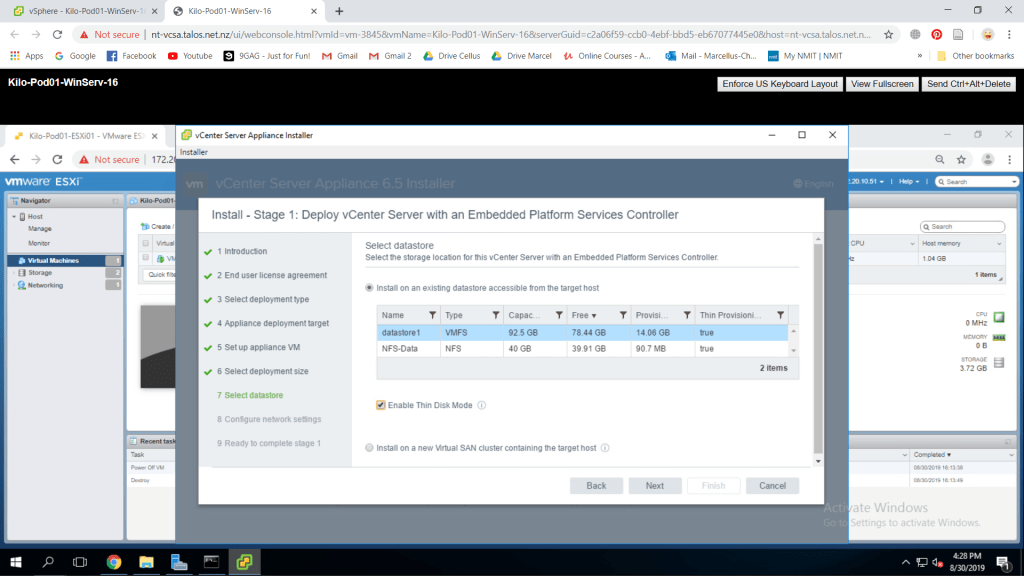
Next part, we would need to select the datastore in th ESXi where we would want to use for VCSA. It is recommended to Enable This Disk Mode which is a thin provisioning method that will take space as it is needed and expands as it is supposed to. After you have chosen your preferred datastore, press Next.
Now we go back to the installer and try to fill in the rest of the information. Fill the IP address with as preferred but should on the same subnet as the ESXi. Fill in the other information with your preferred addresses. Leave the HTTP and HTTPS port as it is and if you are done you can press next to finalize the installation.

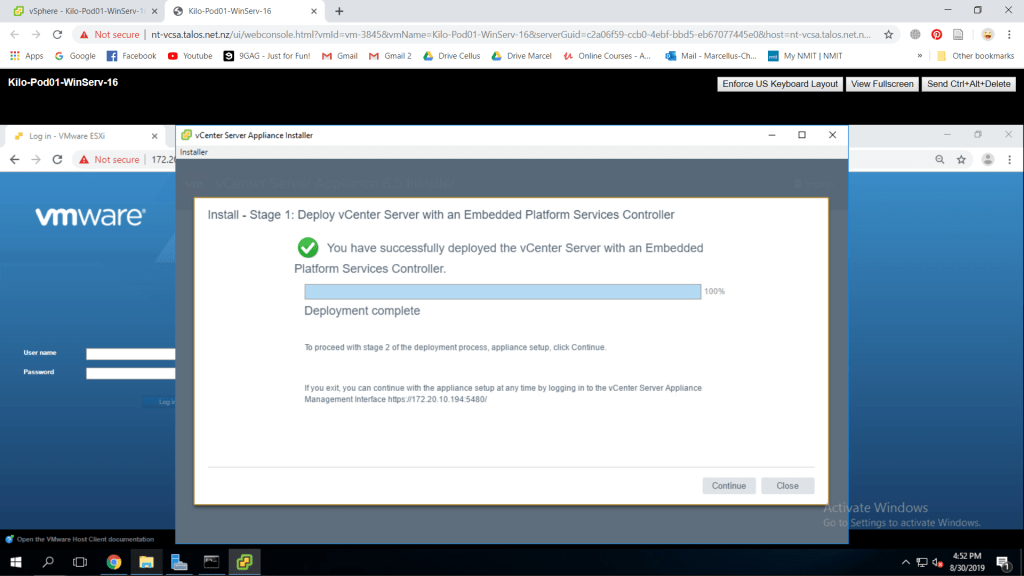
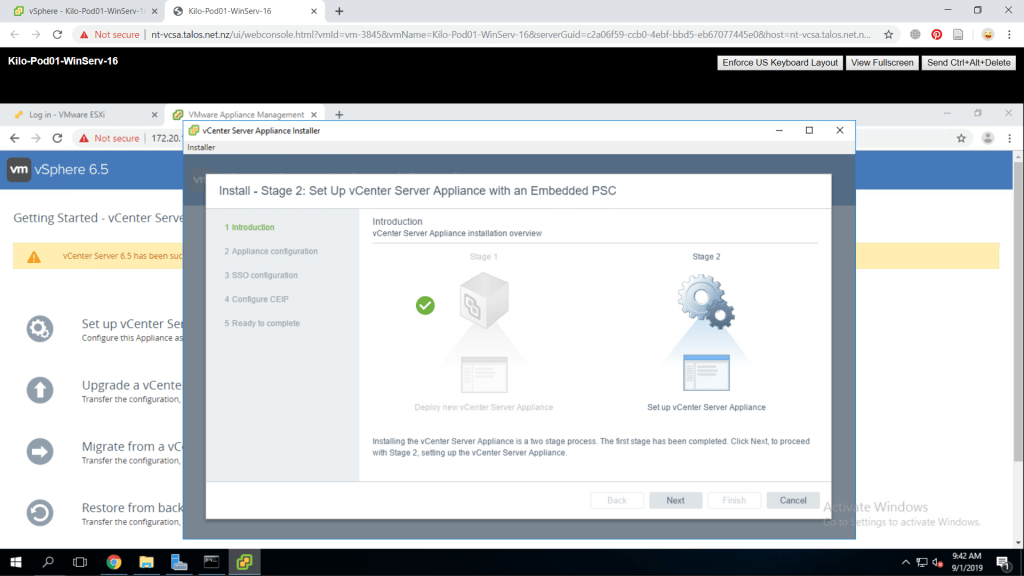
The last page will display summary of the VCSA machine that will be created. Click Finish then the deployment process will start. It would take a while to do the installation. When it is finished, a deployment completion page would appear and press continue to enter step two.
We will now try to complete the stage 2 of VCSA installation. From this point, VCSA VM can be seen in the ESXi host. To continue with the process, press Continue or access https://<VCSA IP Address or FQDN>:5480/ and select Set up vCenter Server Appliance. You will directed to a stage 2 window then press Next.
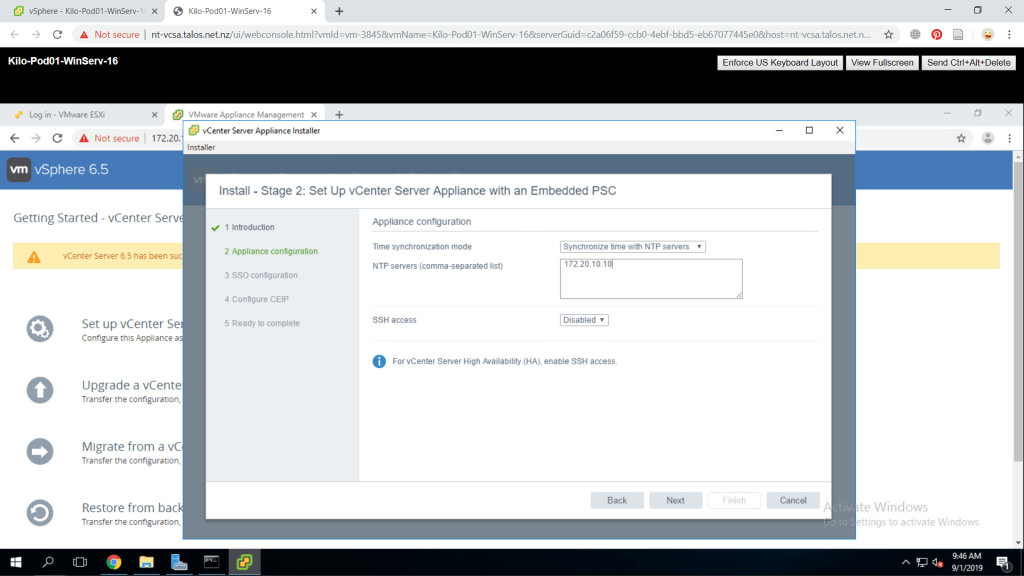
On the appliance configuration page, fill in the NTP servers with the Windows Server machine IP address for clock synchronization. Leave everything as it is and press Next.
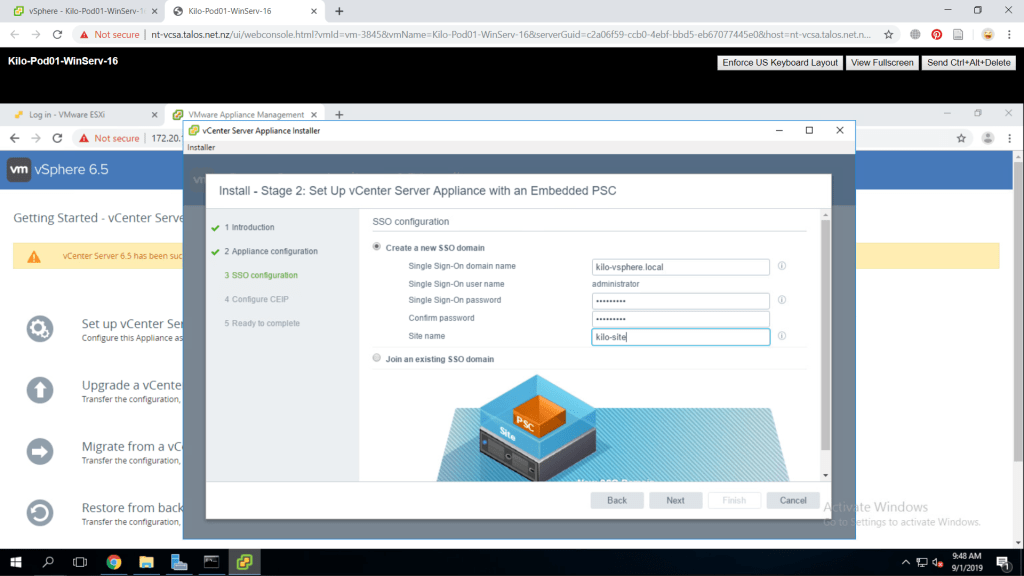
Next page is the SSO (Single Sign-On) configuration where we will be creating a new SSO domain. Fill in all the information as preferred. Remember that we are creating a new domain in this configuration, not joining an existing one. Press Next to continue.
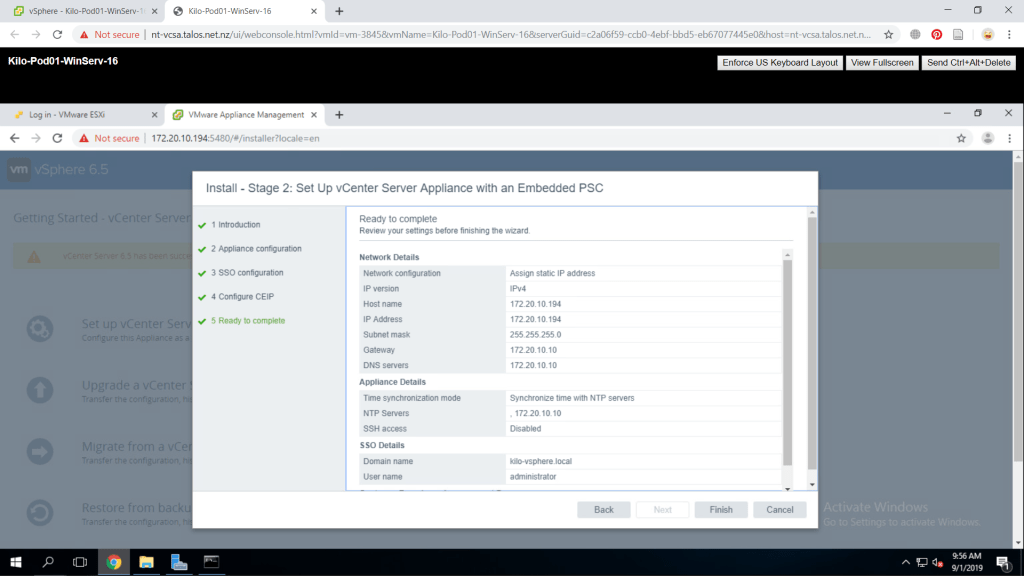
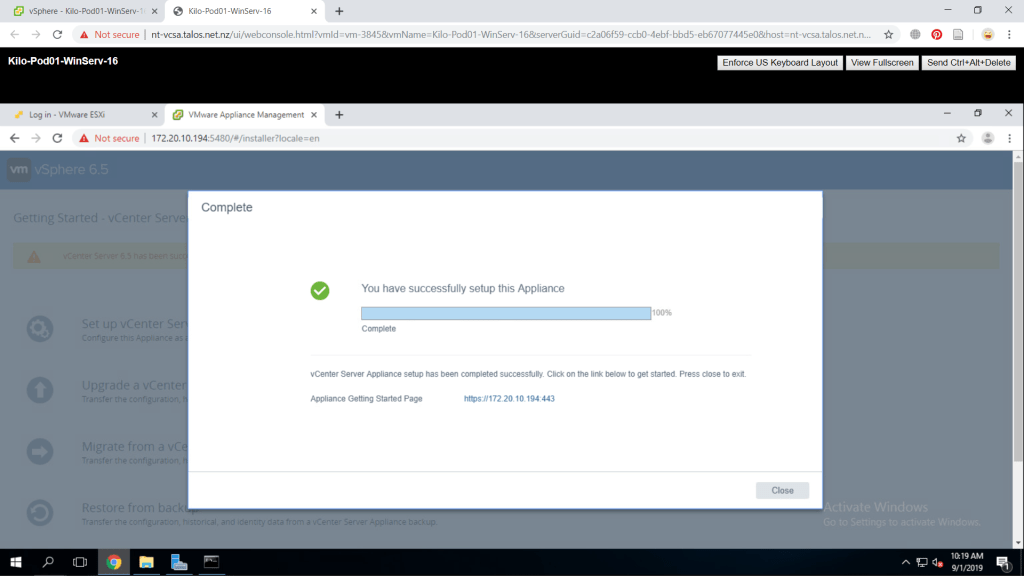
In the configure CEIP page, deselect Join the VMWare’s CEIP and press Next. Last part is the summary of your configuration, you could recheck if everything is as you configured. Press Finish and the installation the set up process will proceed. A prompt will appear and click OK.
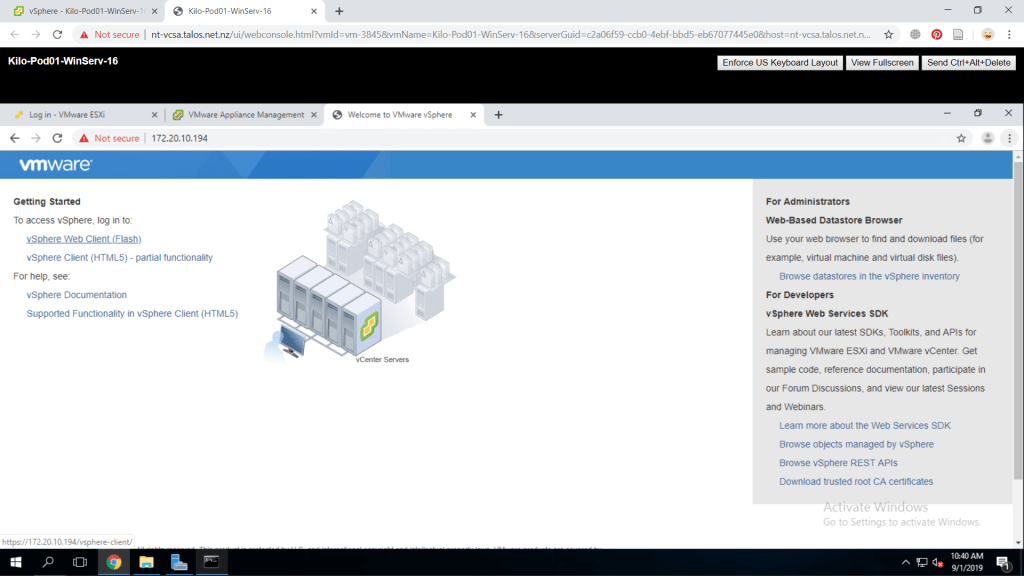
The set up for VCSA is now done. You could access it through https://<VCSA IP Address>:443/.
Configure vCenter Server Appliance
After the VCSA is deployed and configured, we will configure vCenter Server and ESXi Host access from the vSphere Client. Access your VCSA client through port 443 from your internet browser. Proceed to the page if your browser gives a warning to the designated page. Afterwards, we will use vSphere Web Client (Flash) to proceed.
Fill in the credentials as you have just made in the VCSA domain setup. The default username is administrator@<your domain name>. Press login to proceed to the web client.

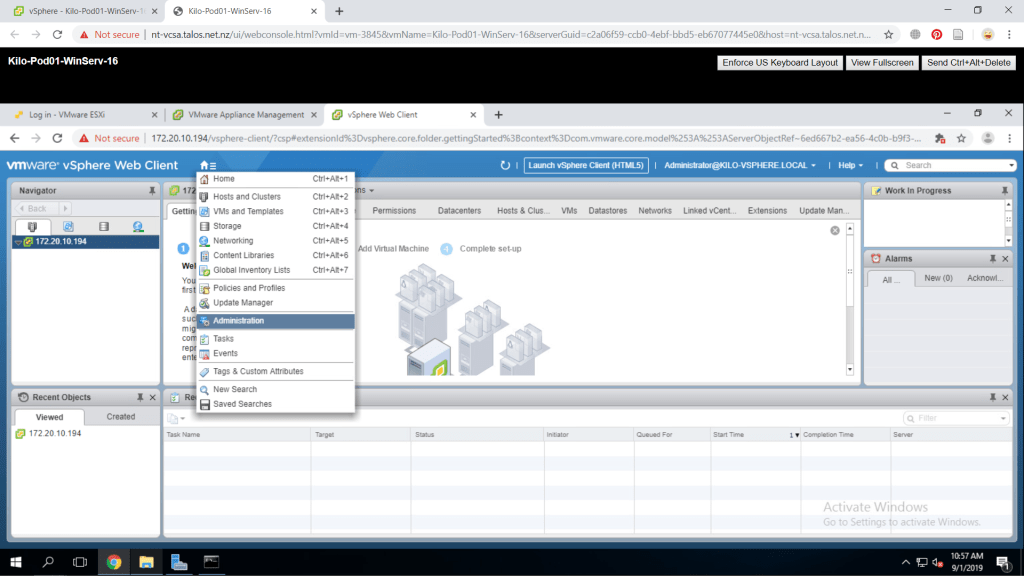
We will now configure the licenses for the vCenter and ESXi hosts. From the main page, open the menu with the home icon and go to Administration.
After that, from the left pane click Linceses. On the center pane, click the Licenses tab and find the green plus sign to create new licenses.
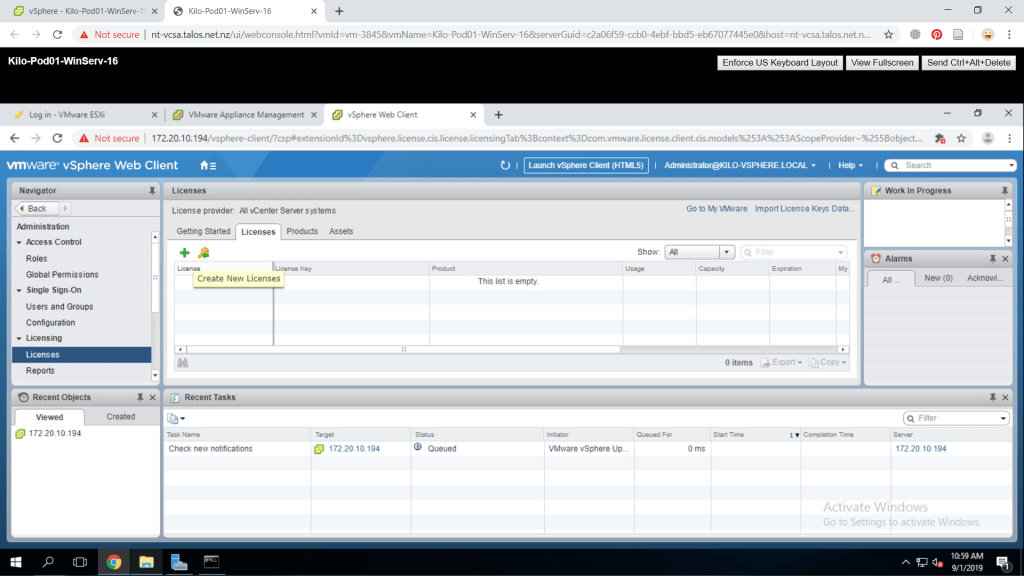
This is the page where you will enter your ESXi and vCenter licenses. Write one line per license and press Next if you are done. You will give the license a name for better organization and assign the license. In my case, I will not be filling any licenses at the moment.

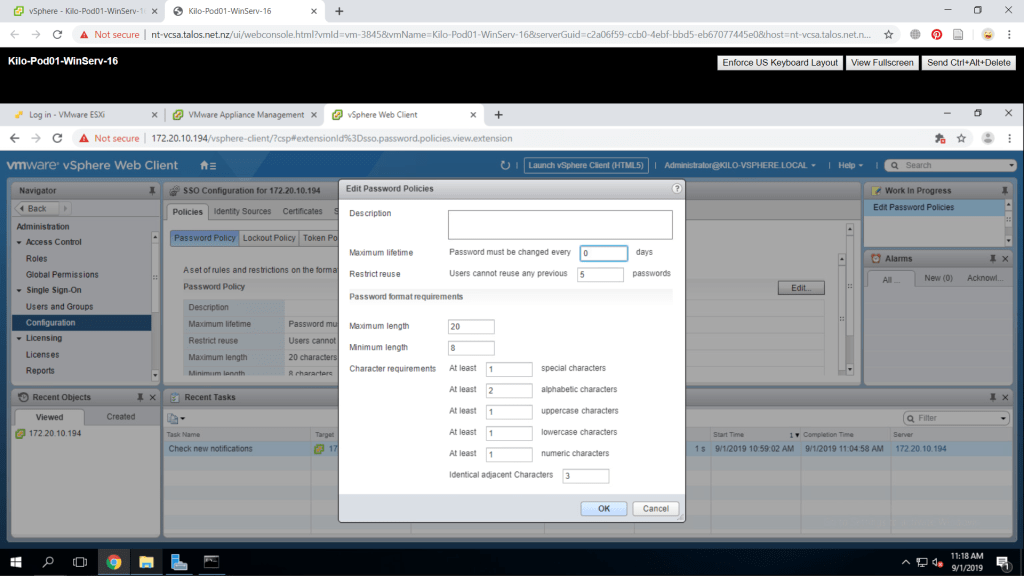
Next part is configuring the SSO policies. Go back to the web client administration page and access Configuration under the Single Sign-On page. On the center pane, you should be on Policies > Password Policy tab. From here, click Edit button. Change the maximum lifetime to 0 which means the password will not expire. Press OK to confirm.
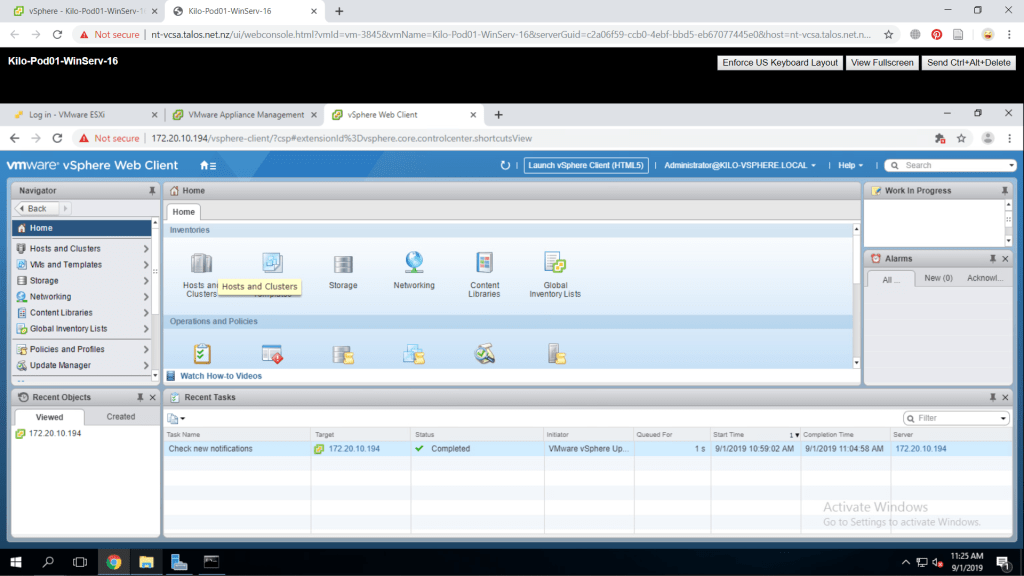
We will create a new Datacenter next. From the web client, open the home icon and choose Home. Select Host and Clusters on the center pane.
On the left pane, find your vCenter Server and right-click on it to find New Datacenter to create one.
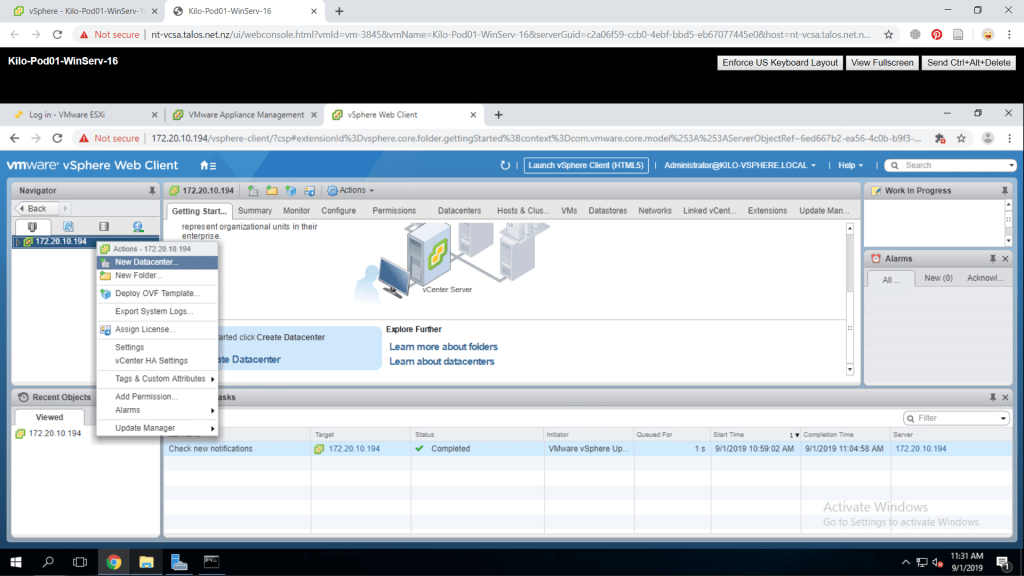
A new window will appear and give the Datacenter a name you prefer the press OK. The new Datacenter has now been created.

Add ESXi hosts to vCenter Server Inventory
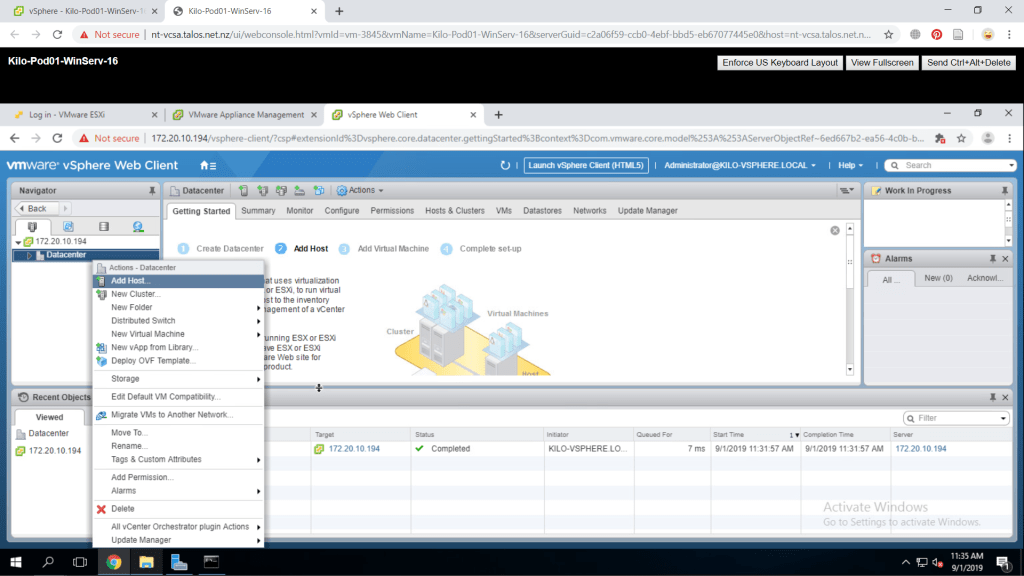
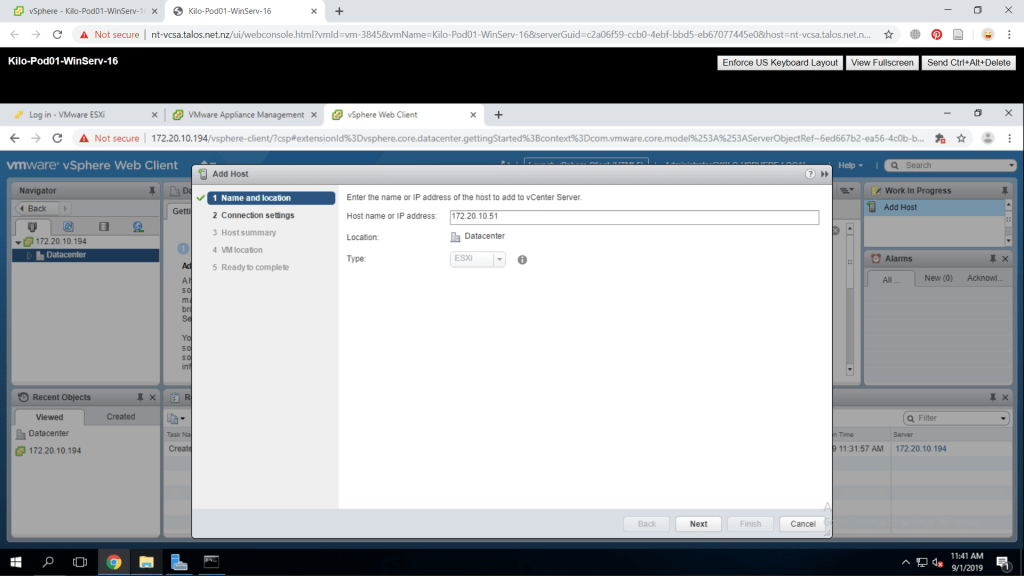
Start by creating a new host on the newly created datacenter. We can do that by right-clicking the new datacenter and choose Add Host.
A window will appear and fill in the text box with your ESXi host name or IP Address. I will input my IP address as i have no domain available in the network.
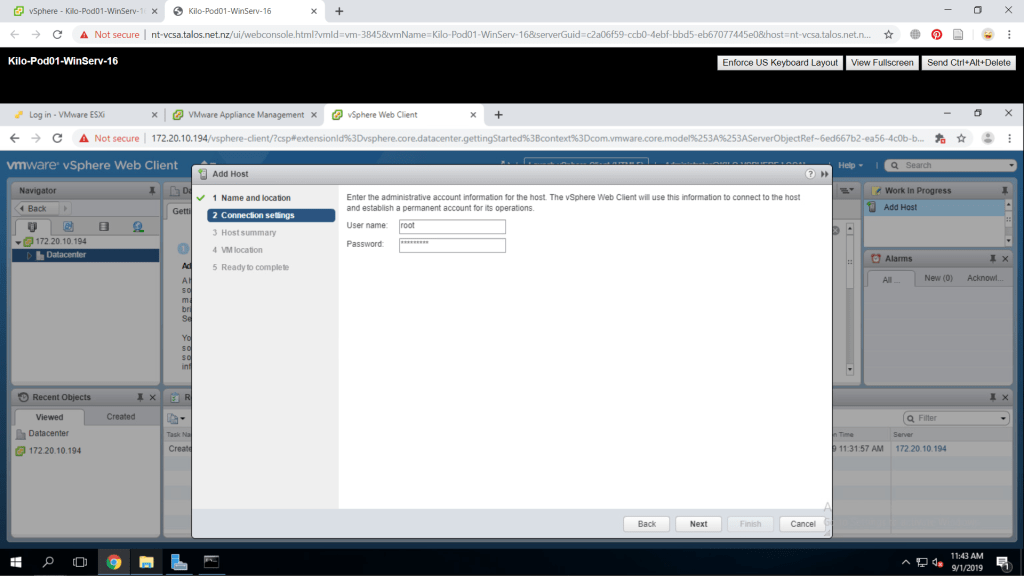
On the next page, you will need to enter the ESXi credentials for verification. Press Yes to the security alert window.
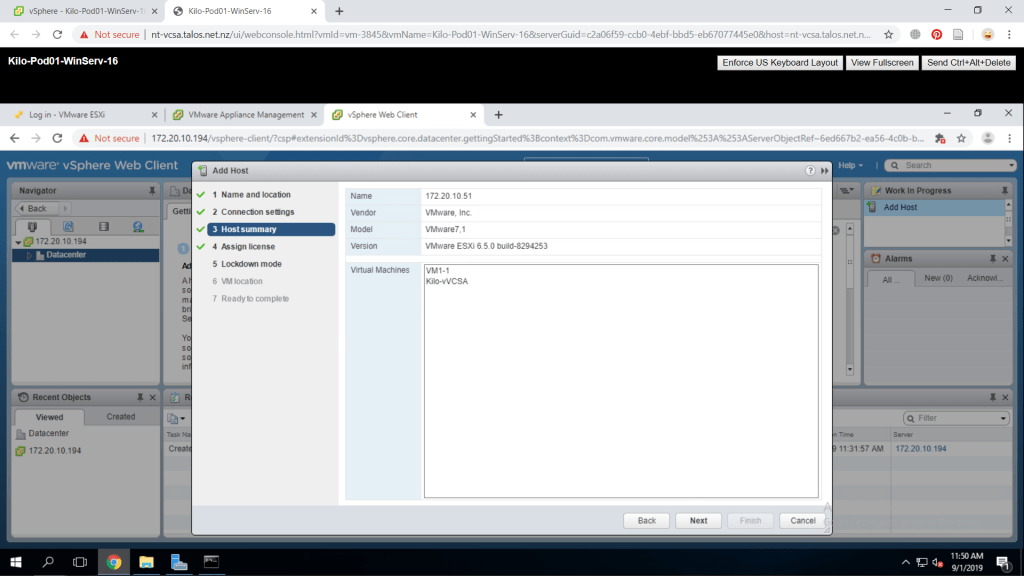
Press Next on the Host Summary.
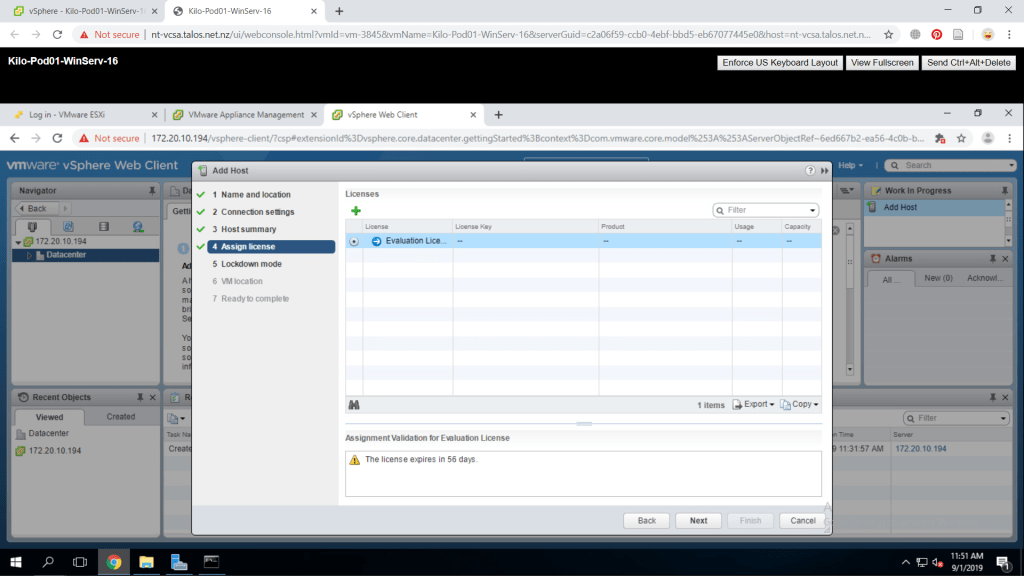
This is the license page information of the host. Press Next to continue.
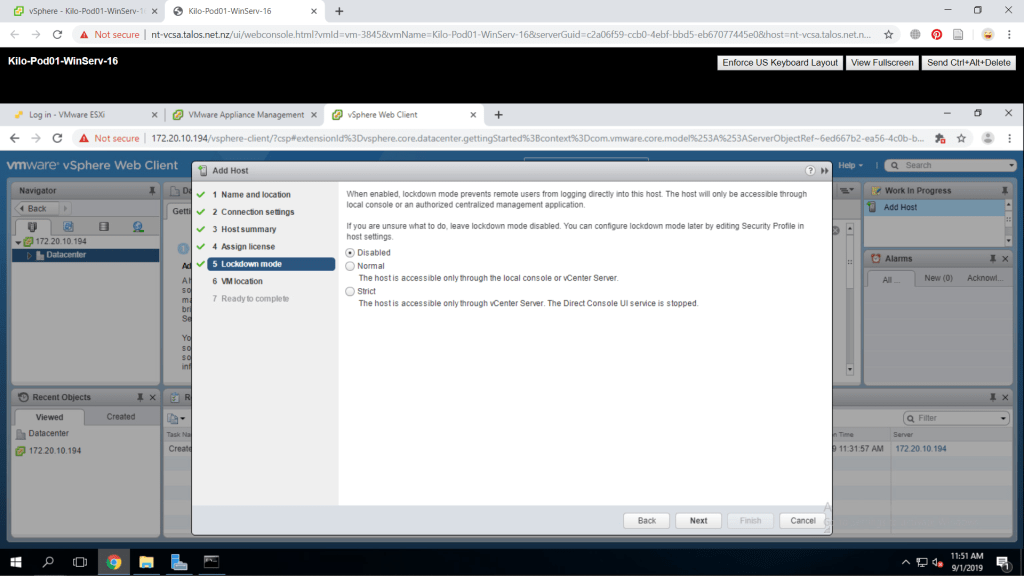
Lockdown mode is by default set to Disabled and leave it that way. Press Next.
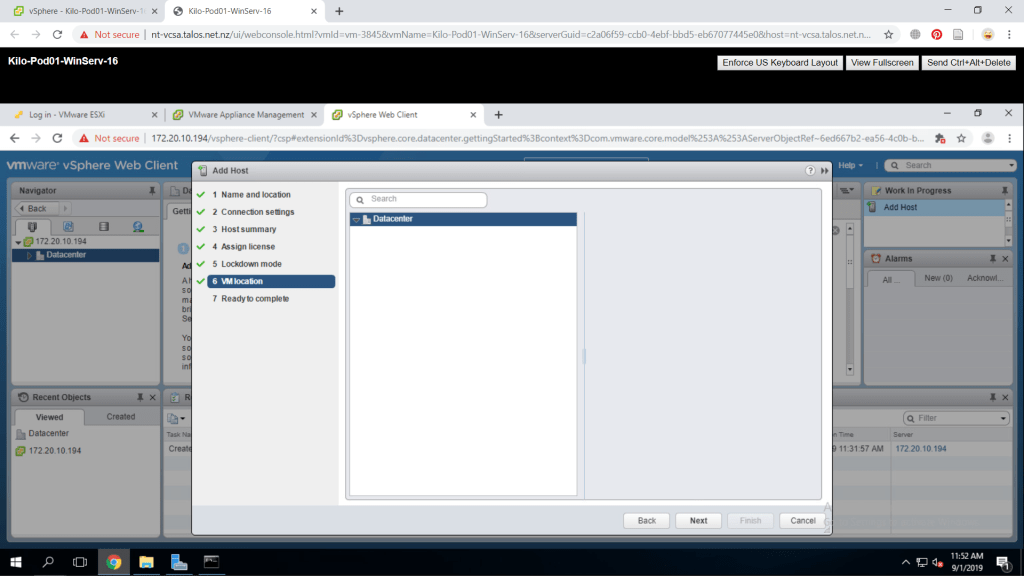
Next, select the VM location which is the datacenter we have just created. Press Next to continue.
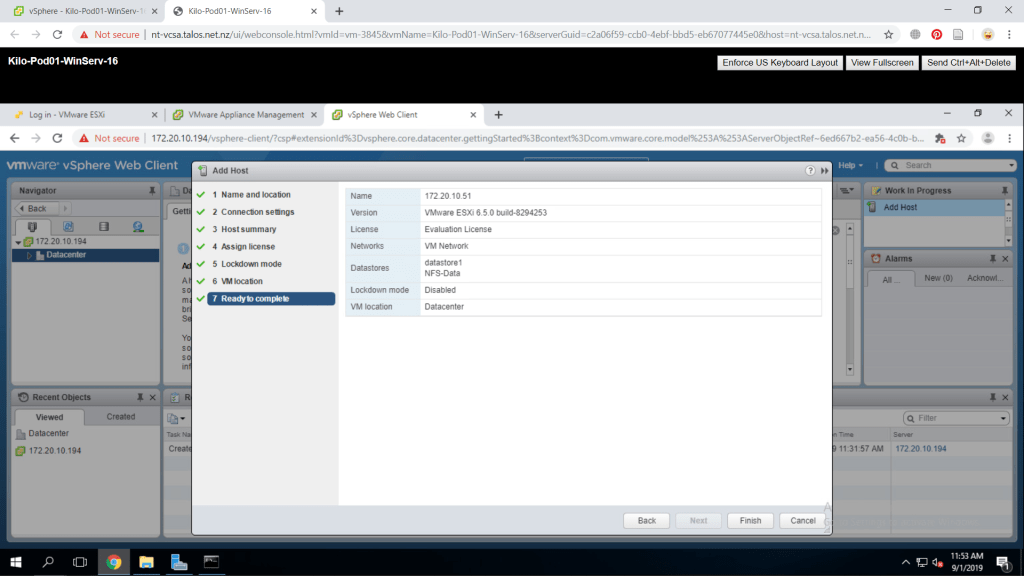
Next page is the summary of all the configuration. Make sure everyhting is good and press Finish.
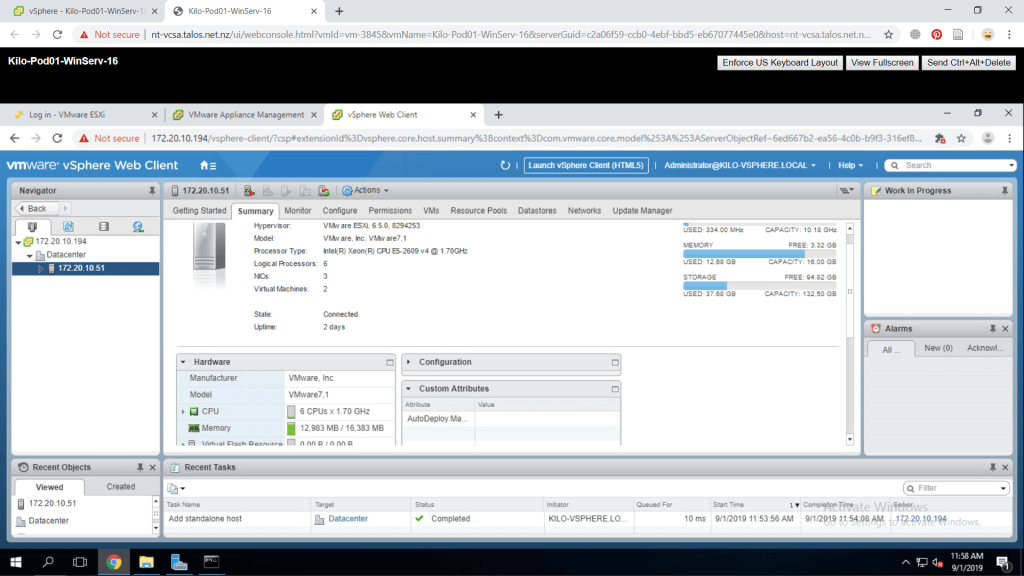
The ESXi host is now in the registered in the data center. Click on the newly created host from the left pane then select Summary tab on the middle pane. Expand the hardware pane to check its hardware specifications.
Configure ESXi hosts as NTP Clients
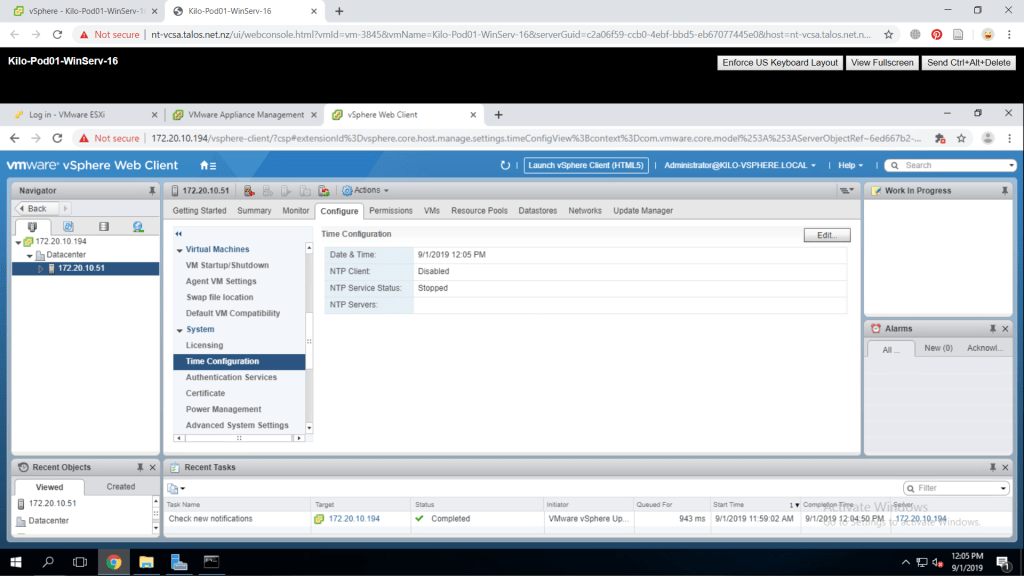
From the vCenter web client Hosts and Clusters page. Go to the Configure tab of your ESXi and select Time Configuration menu under System.
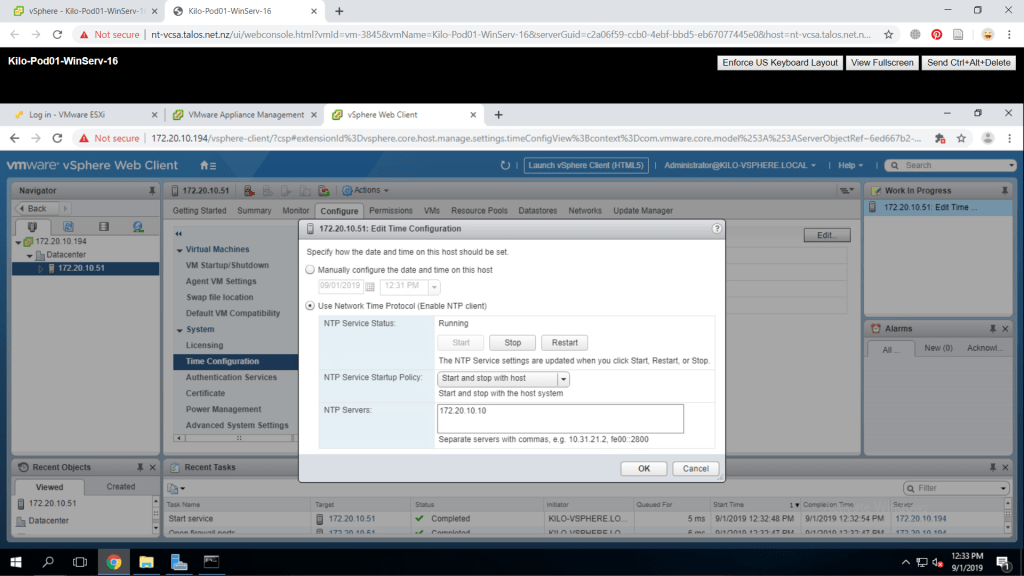
Press the Edit button on the Time Configuration menu. On the Edit Time Configuration Window, select Use Network Time Protocol (Enable NTP Client). For NTP Service Startup Policy, choose Start and stop with host. Fill in the NTP Servers with your designated NTP Server IP Address which in my case is my Windows Server machine. Lastly, Press Start on NTP Service Status and the NTP service will now run. Click OK to accept the changes.
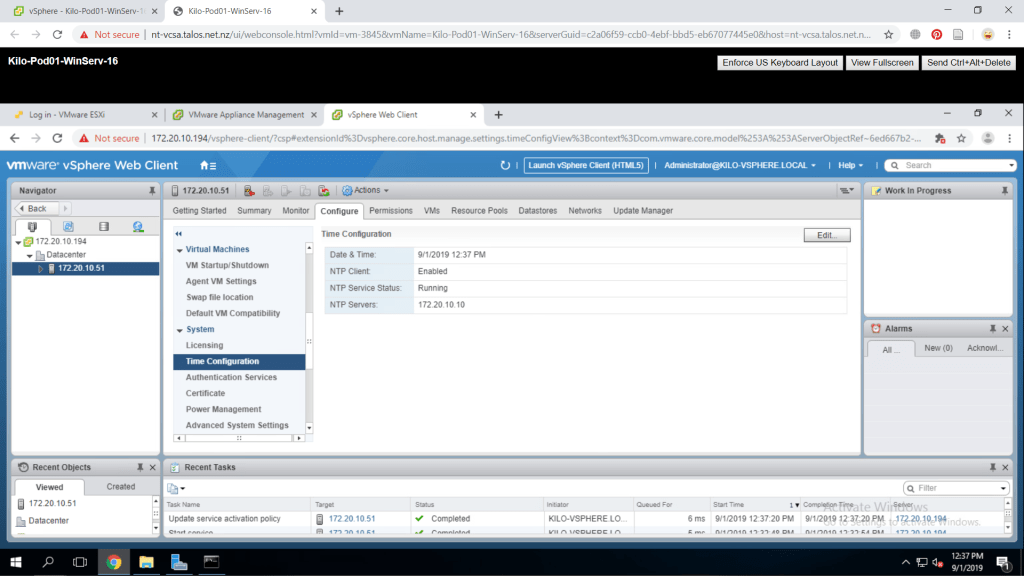
Now, in the Time Configuration page, the NTP Client is now Enabled.
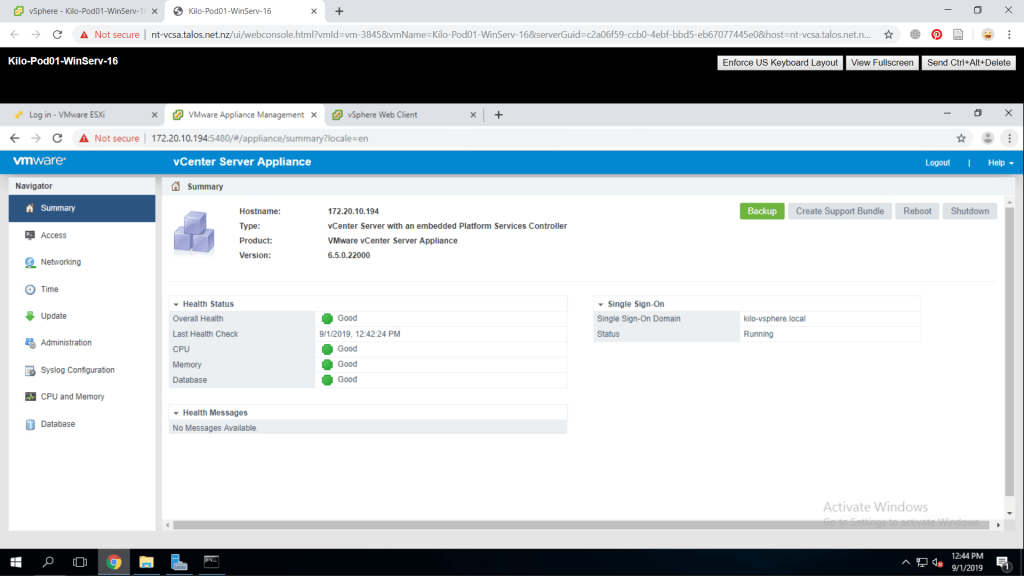
Back Up vCenter Server Appliance
To start, go to https://<VCSA IP address or FQDN>:5480/ on your internet browser. A login page for vSphere Appliance Management will appear and fill in the credentials with your root as the username and your password.
Select Backup on the upper-right part of the Summary page.
A Backup Appliance windows will appear. We will choose FTP for the backup Protocol. Fill in the location as preferred, be sure to create the folder first. Leave the port number as default. Fill in the username and password as preferred. Press Next to continue.
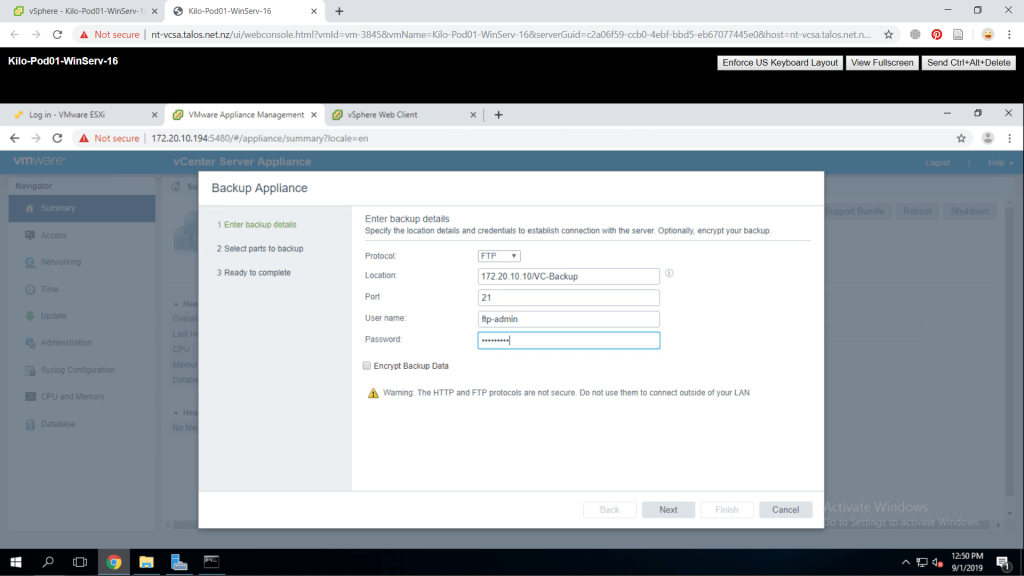
I have no FTP set up in the windows server however this back up process is quite simple to do. As you have provided the location and credential, it’s about done. Click finish and the back up is done.
